
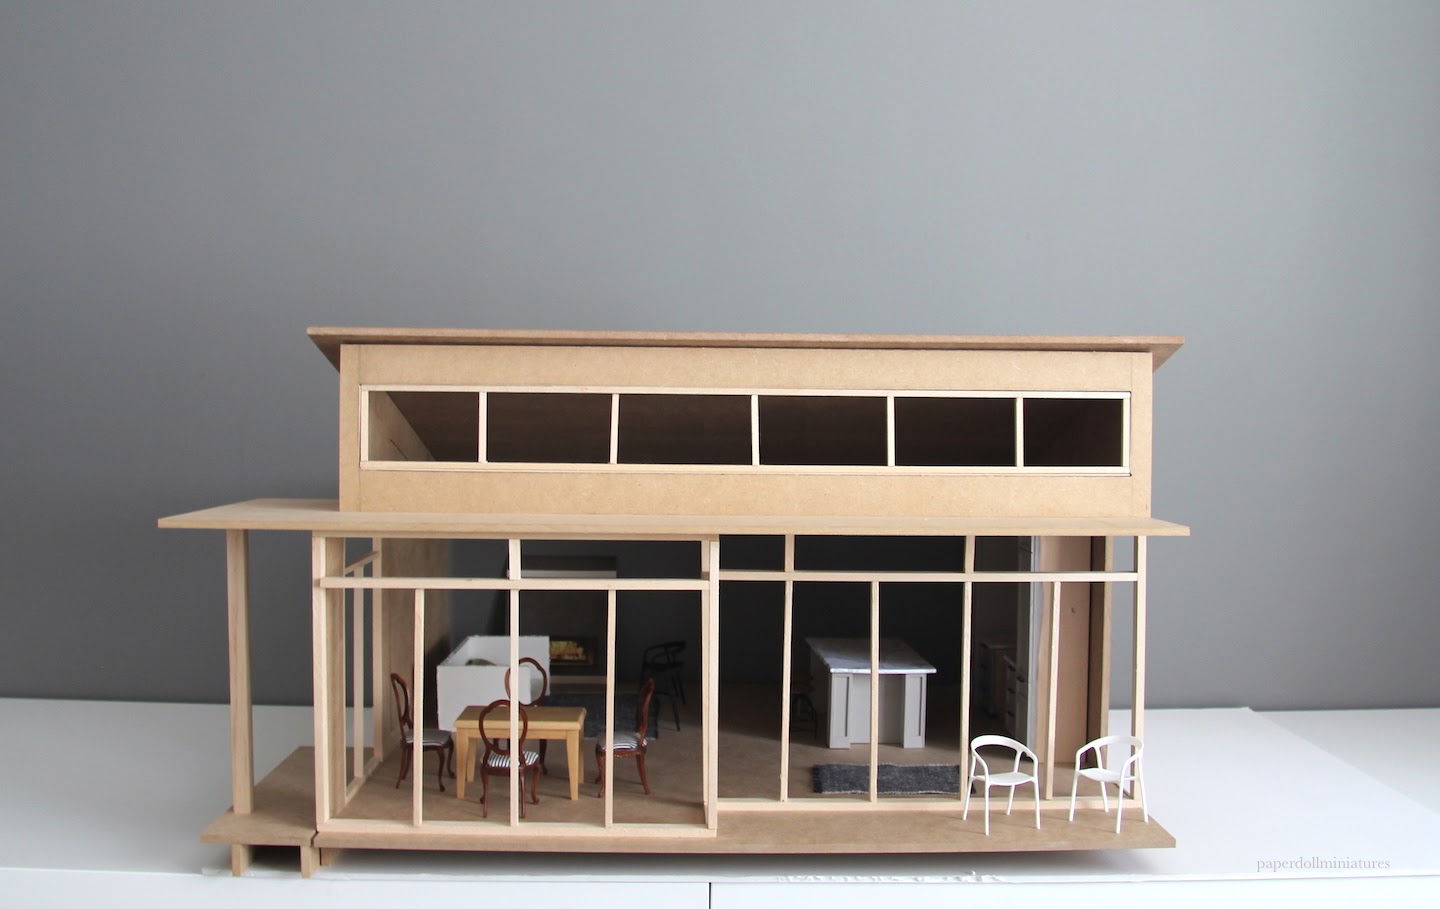
The design has under gone a couple of changes from my last post and re-introduces a (side) porch from the original kit. The last bit left on the design to tinker with is roof at the front.

This house has 3 main points of entry; the back, a side hinged wall door, and the roombox extension when separated from the house. (The plan is to have the front windows slide or hinge open too!)
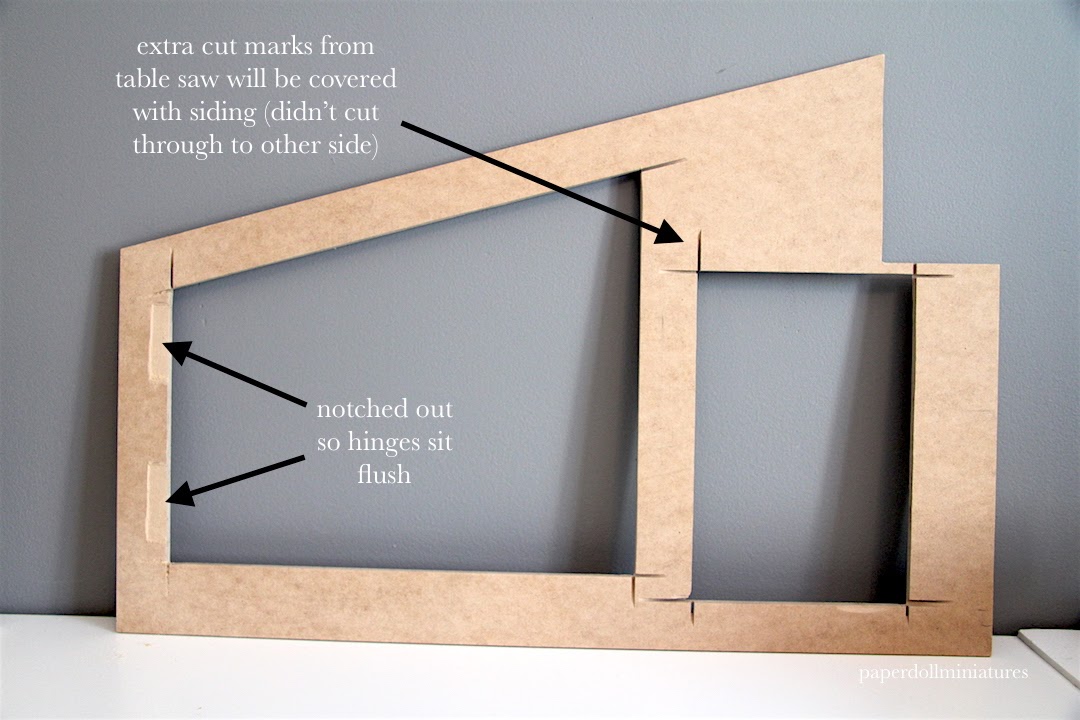
The side hinged door:
My boyfriend (who spent years in construction) was able to cut the openings for me using a table saw. He kind of freehanded it and lifted the mdf off the saw to stop the cut. I know this isn't the norm and a jigsaw or a router are usually the way to go about it... but I'm not complaining because it gave me lines that are perfectly straight! It did leave cutaway marks on one side of the wall but I'll cover with siding no problem.
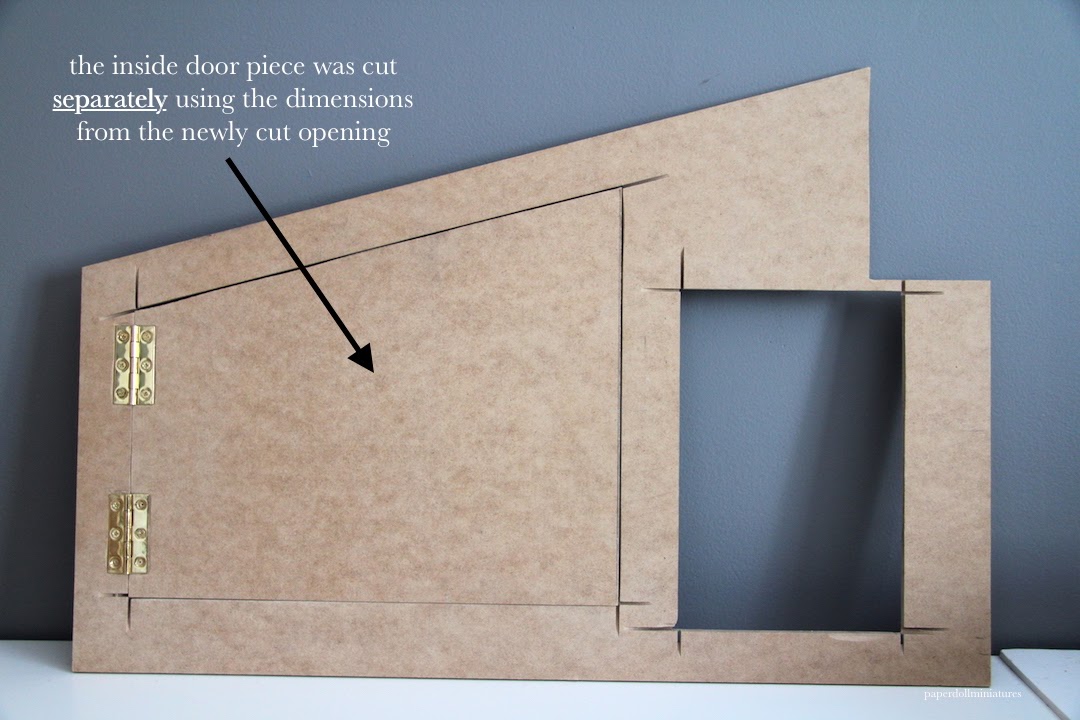
The inner door is cut afterwards using the dimensions from the opening and fitted in.


The roombox extension:
Another great option for accessibility (and a space saver!) is joining two separate pieces together. I once saw this done at the Little Dollhouse Company on the Italianate Victorian they had for awhile and it's something that stuck with me. I love the way a large build can be displayed and played with in parts.

On its own:
The back: isn't finished yet but it will be a simple wall that can be slid out and removed when needed.

Next steps are ripping down thin strips of wood for flooring and cladding, and starting on the windows/doors at the front. A lot of the framing will be redone in the new wood too. And I'm working on my new kitchen design for the laser cutter.
Hope you all are well! Happy mini-making this weekend!
Nice changes! It looks so different while keeping the essence of the kit. I'm excited to see the decor. :D
ReplyDeleteThank you Brae, that's such a great compliment! With all my size changes I really wanted to ensure the kit was still in there.
DeleteHonestly too many drab photos of mdf... can't wait to bring on the decor! :)
The open-plan concept is really suited to this kit Kristine, and your wall of windows and the opening side panel are simply BRILLIANT both practically and aesthetically!
ReplyDeleteLove the proposed furniture layout as well! :D
Thank you Elizabeth. It proved to be quite a challenge creating a layout with openings but I'm excited to move forward and get to decor and finishings!
DeleteWow! That's a whole lotta progress! I love what you've done to keep the kit shape while at the same time make it look totally different. Great ideas for accessibility, thanks for sharing.
ReplyDeleteThank you Keli, it took awhile to really nail down the design. I know you know what that's like!
DeleteMy hope is to now keep progress posts a bit smaller and more frequent as I switch to decor and finishing. :)
Tiene un aspecto fantástico, deseosa de ver lo siguiente.Feliz fin de semana:-)
ReplyDeleteGracias! Feliz fin de semana para ti también!
DeleteVow, looking forward to your progress with this!
ReplyDeleteThanks Ingi, hopefully next time will be more colourful and exciting too :)
DeleteDesde luego la estructura es preciosa.
ReplyDeleteGracias Isabel! Esperamos que la próxima vez.
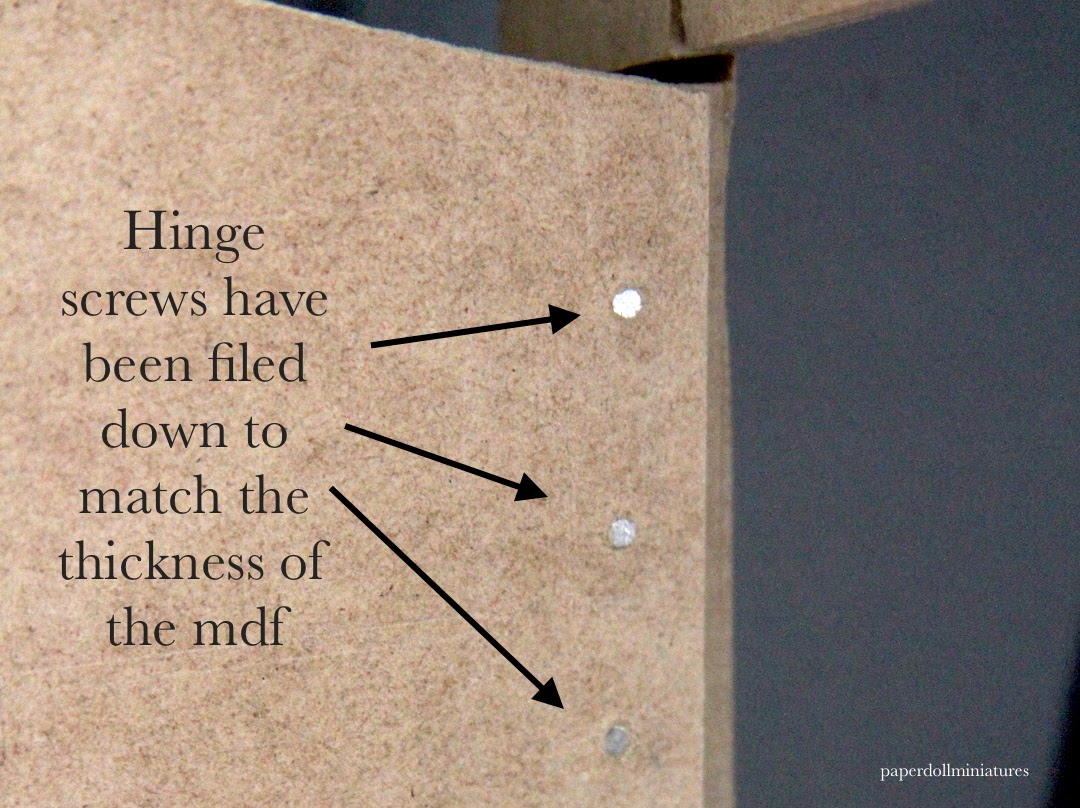
DeleteWow, that looks amazing! What do you use to file down the hinges? I love all your ideas on making it accessible. So cool! Especially the shapes of the hinged door! And the furnishings already look stunning!
ReplyDeleteThanks Penelope! Everything inside is a mis-mash right now from my other roomboxes so I'm excited to make and finalize my final items.
DeleteAs for filing the hinge screws, the files I used were regular files made of metal. An inch or so wide by several inches long. You can find them at hardware stores, mine were in a set. They are bigger then the jewelry files which are quite tiny. Hope that helps! It is so much easier then finding tiny tiny screws! :)
What fantastic ideas! I'm so glad that you're doing the contest kit this year! You are really raising the bar!
ReplyDeleteMe too Jodi! Thanks so much! I just knew this was the right kit for me to jump on. That timeline definitely puts a bit of pressure to get it done too.
DeleteYou've come up with excellent solutions for access into the building - not only to take photos but also getting your hands in there to decorate and move furniture around. I looks really wonderful Kristine, you're doing an amazing job :0)
ReplyDeleteI think we all can remember the last time we were setting up a scene and accidentally brushed our hands and knocked everything over at the last minute! Hopefully I've decreased my chances with the extra door ;) Thanks so much for the encouragement!
Deletekristine, this is coming along super! and the solution with the door opening on the side is excellent. and this addition gives you more space.. clever! I hope it is all still lose because you seem to be in for a bit of priming and prainting ;-)
ReplyDeleteYes nothing is glued yet! I hadn't thought of that but it's probably good that the walls can still come apart to make it easier to put up the finishings. You would know after all your houses! Thanks for the advice! :)
DeleteOh wow! Looks amazing so far! Love the windows. Will you be adding windows to the side addition?
ReplyDeleteThanks Sheila, yes the plan is to put in some windows in the roombox but not the front facing wall of it... I'm thinking I need some wall space to display the wood cladding or stone work?
DeleteIt was a great kit to start with. Your kit bashing made it even better.
ReplyDeleteSuch a great compliment thanks!
DeleteThis is amazing...great work.
ReplyDeleteSo excited to see what you do with your kit! :)
DeleteI love what you're doing with the place! The hinged door is the perfect solution to the accessibility. The windows are fantastic!
ReplyDelete