
Disclosure: This post includes products that were gifted to me by miniatures.com. I did not receive payment for this content, and all opinions are my own.

To get the planters ready I started off by adding some interior foam board wall pieces to raise the soil beds (in some cases I used a thick foam sheet too). Then I added a piece of foam board on top.

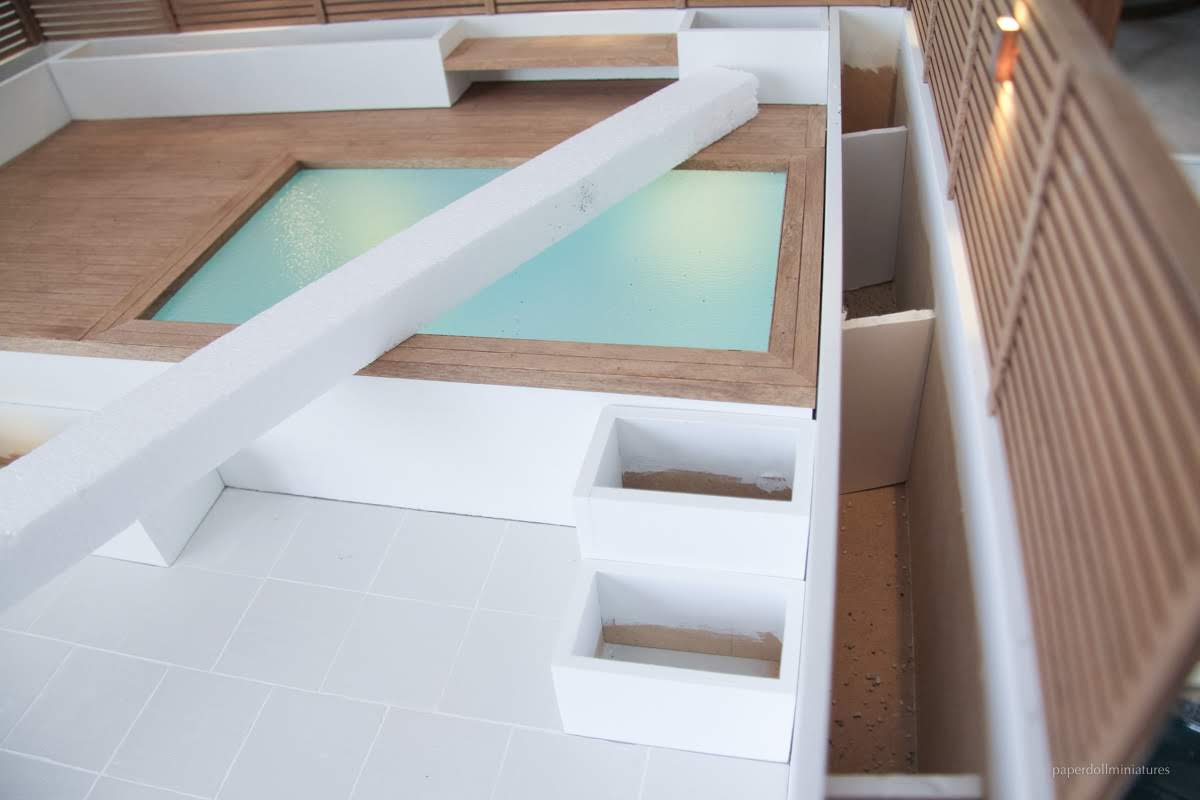

I looked at both soil and rocks to fill my garden and decided I liked the soil with the little "garden growies" best.


I painted the foamboard black to blend in with the soil.


Next, I used some Fine Turf material from my local hobby shop and some Scenic Cement. I used a washed out spray bottle to apply the Scenic Cement on the painted foam board. Then sprinkled on the fine turf mix and shook off any excess. *New Update! I've learned Arlene's Spray Tackly Glue works better than the scenic cement!


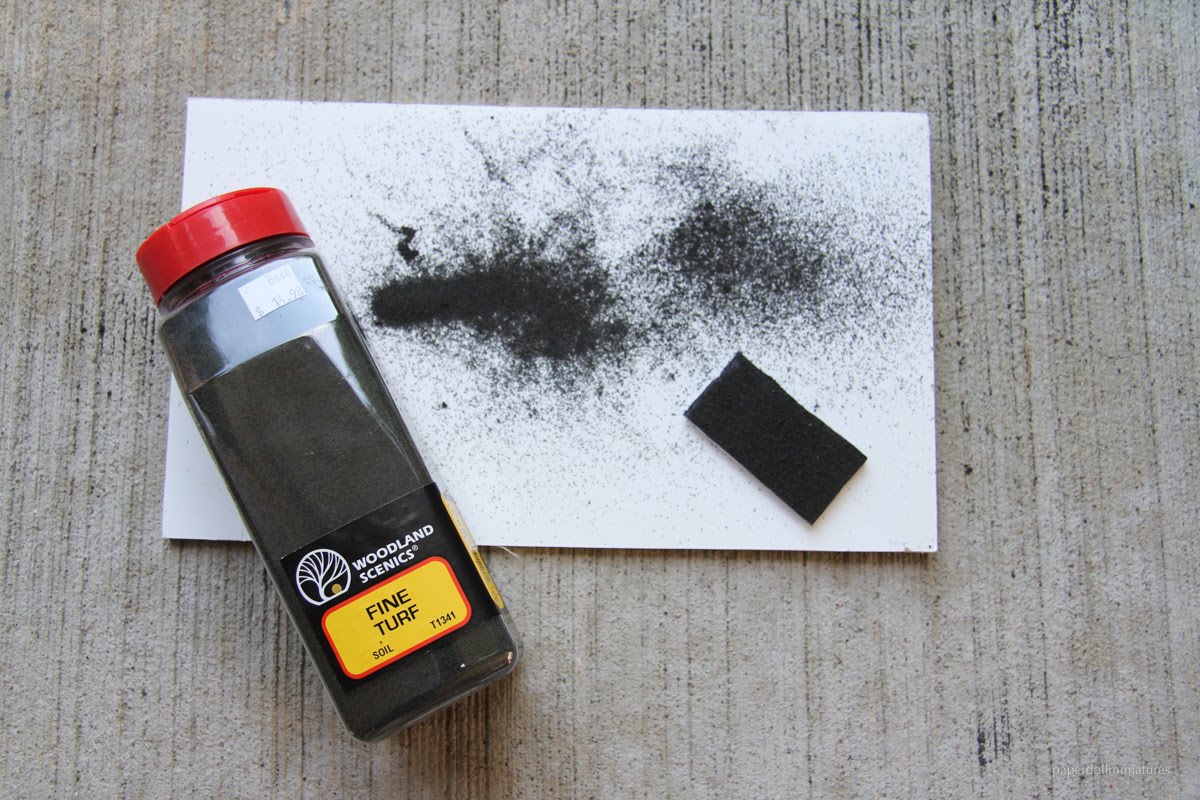
Once dry I fitted these top pieces back into the planters. I think the soil looks very realistic because it's so fine.


Ready for plants!!!
I bought a couple packages of the Garden Growies in both colour selections (here and here) to create bushes with. They add a great pop of colour to the soil. While I had been thinking of using them as big fluffy bushes to fill my planters they actually work better as ground cover or smaller sized plants. So I changed my design plan a bit.

To make some little bushes in my scene I layered the fluff and the glue to create tiny mounds.


Next time I might try some spray adhesive instead of the tacky glue (or even the Scenic Cement which I used for the soil) because that would help with the little runaways. **Update! I tried using spray adhesive later in the week and it works so much better to secure the garden growies!! Much easier to work with.
Up close they might look a little unruly, but when combined with the other plants I think they look fantastic and add some dimension to the planters. And look how vibrant the colour is!

Heres a look at the mixed variety in the lower container.

And the red ones in the back with the "Squeeze Me" trees:

I also was surprised with the squeeze me style tree bushes. Kat, who also just finished a Patio scene, told me how they could be cut and manipulated in different ways because the material went all the way through. This really helped create different shapes and styles to mix in the garden.

Cutting the bottoms off the 4" trees helped them sit flat while cutting the circular bushes in half made them look a little less formal.

To round out the planters I put in some garden delights which have a grass-like look. I like the medium height they added.

On to the home stretch! A couple of cushions and some final touch-ups (like those wires hanging behind the fence!) and I think this scene is ready for the summer.
Thank you so much for the messages and encouragement with this project. I haven't been feeling my best the last couple of weeks and have been a bit slower at responding and keeping up with everyone because of that. I hope you all have had a happy and productive mini weekend. See you next week!
I love it! I think the slightly less overgrown look suits the setting.
ReplyDeleteThank you Sheila, I appreciate that. I was really torn about how many plants to add. The whole thing was just filled with bushes until I added the little fluff flowers. This part was definitely out of my comfort zone.
DeleteAbsolutely wonderful!!! Thank you for the links and tips.
ReplyDeleteGeneviève
So nice to hear, thanks Genevieve!
DeleteSome lovely modern formal planting just perfect for the setting. Sorry you are dealing with poorliness. Keep on keeping on. x Off to find squeezy trees????
ReplyDeleteThank you! I always feel bad when I get behind on my blog reading and responding because I appreciate being part of this mini group so much.
DeleteThose squeezy trees really were a great surprise. Happy you liked them too :)
It's amazing how adding the greenery and color into the beds adds so much realism and life! Deciding where to put what in the landscaping is such a challenge, but you have met it beautifully! I love the balance you've created!
ReplyDeleteI hope your bout simmers itself down so that you can begin enjoying the rest of this terrific project and our real life summer!
I Adore miniature gardens and so I am thrilled to see and read about the construction of your contemporary plant installations in this intimate back yard!
ReplyDeleteI LOVE your style of mixing it up, by incorporating different types of greenery in creative and innovative ways, in order to get the texture and the shapes appropriate for the setting and the sight-lines. You have demonstrated this to Perfection, Kristine! :D
I love the variations in heights and mass and negative space along with your clever use of ground covers in vibrant colours to inter-play against the dark soil and the white planters - it all looks totally Professional as well as 100% Sensational! ❤️
These modern plants are perfect in your patio.
ReplyDelete