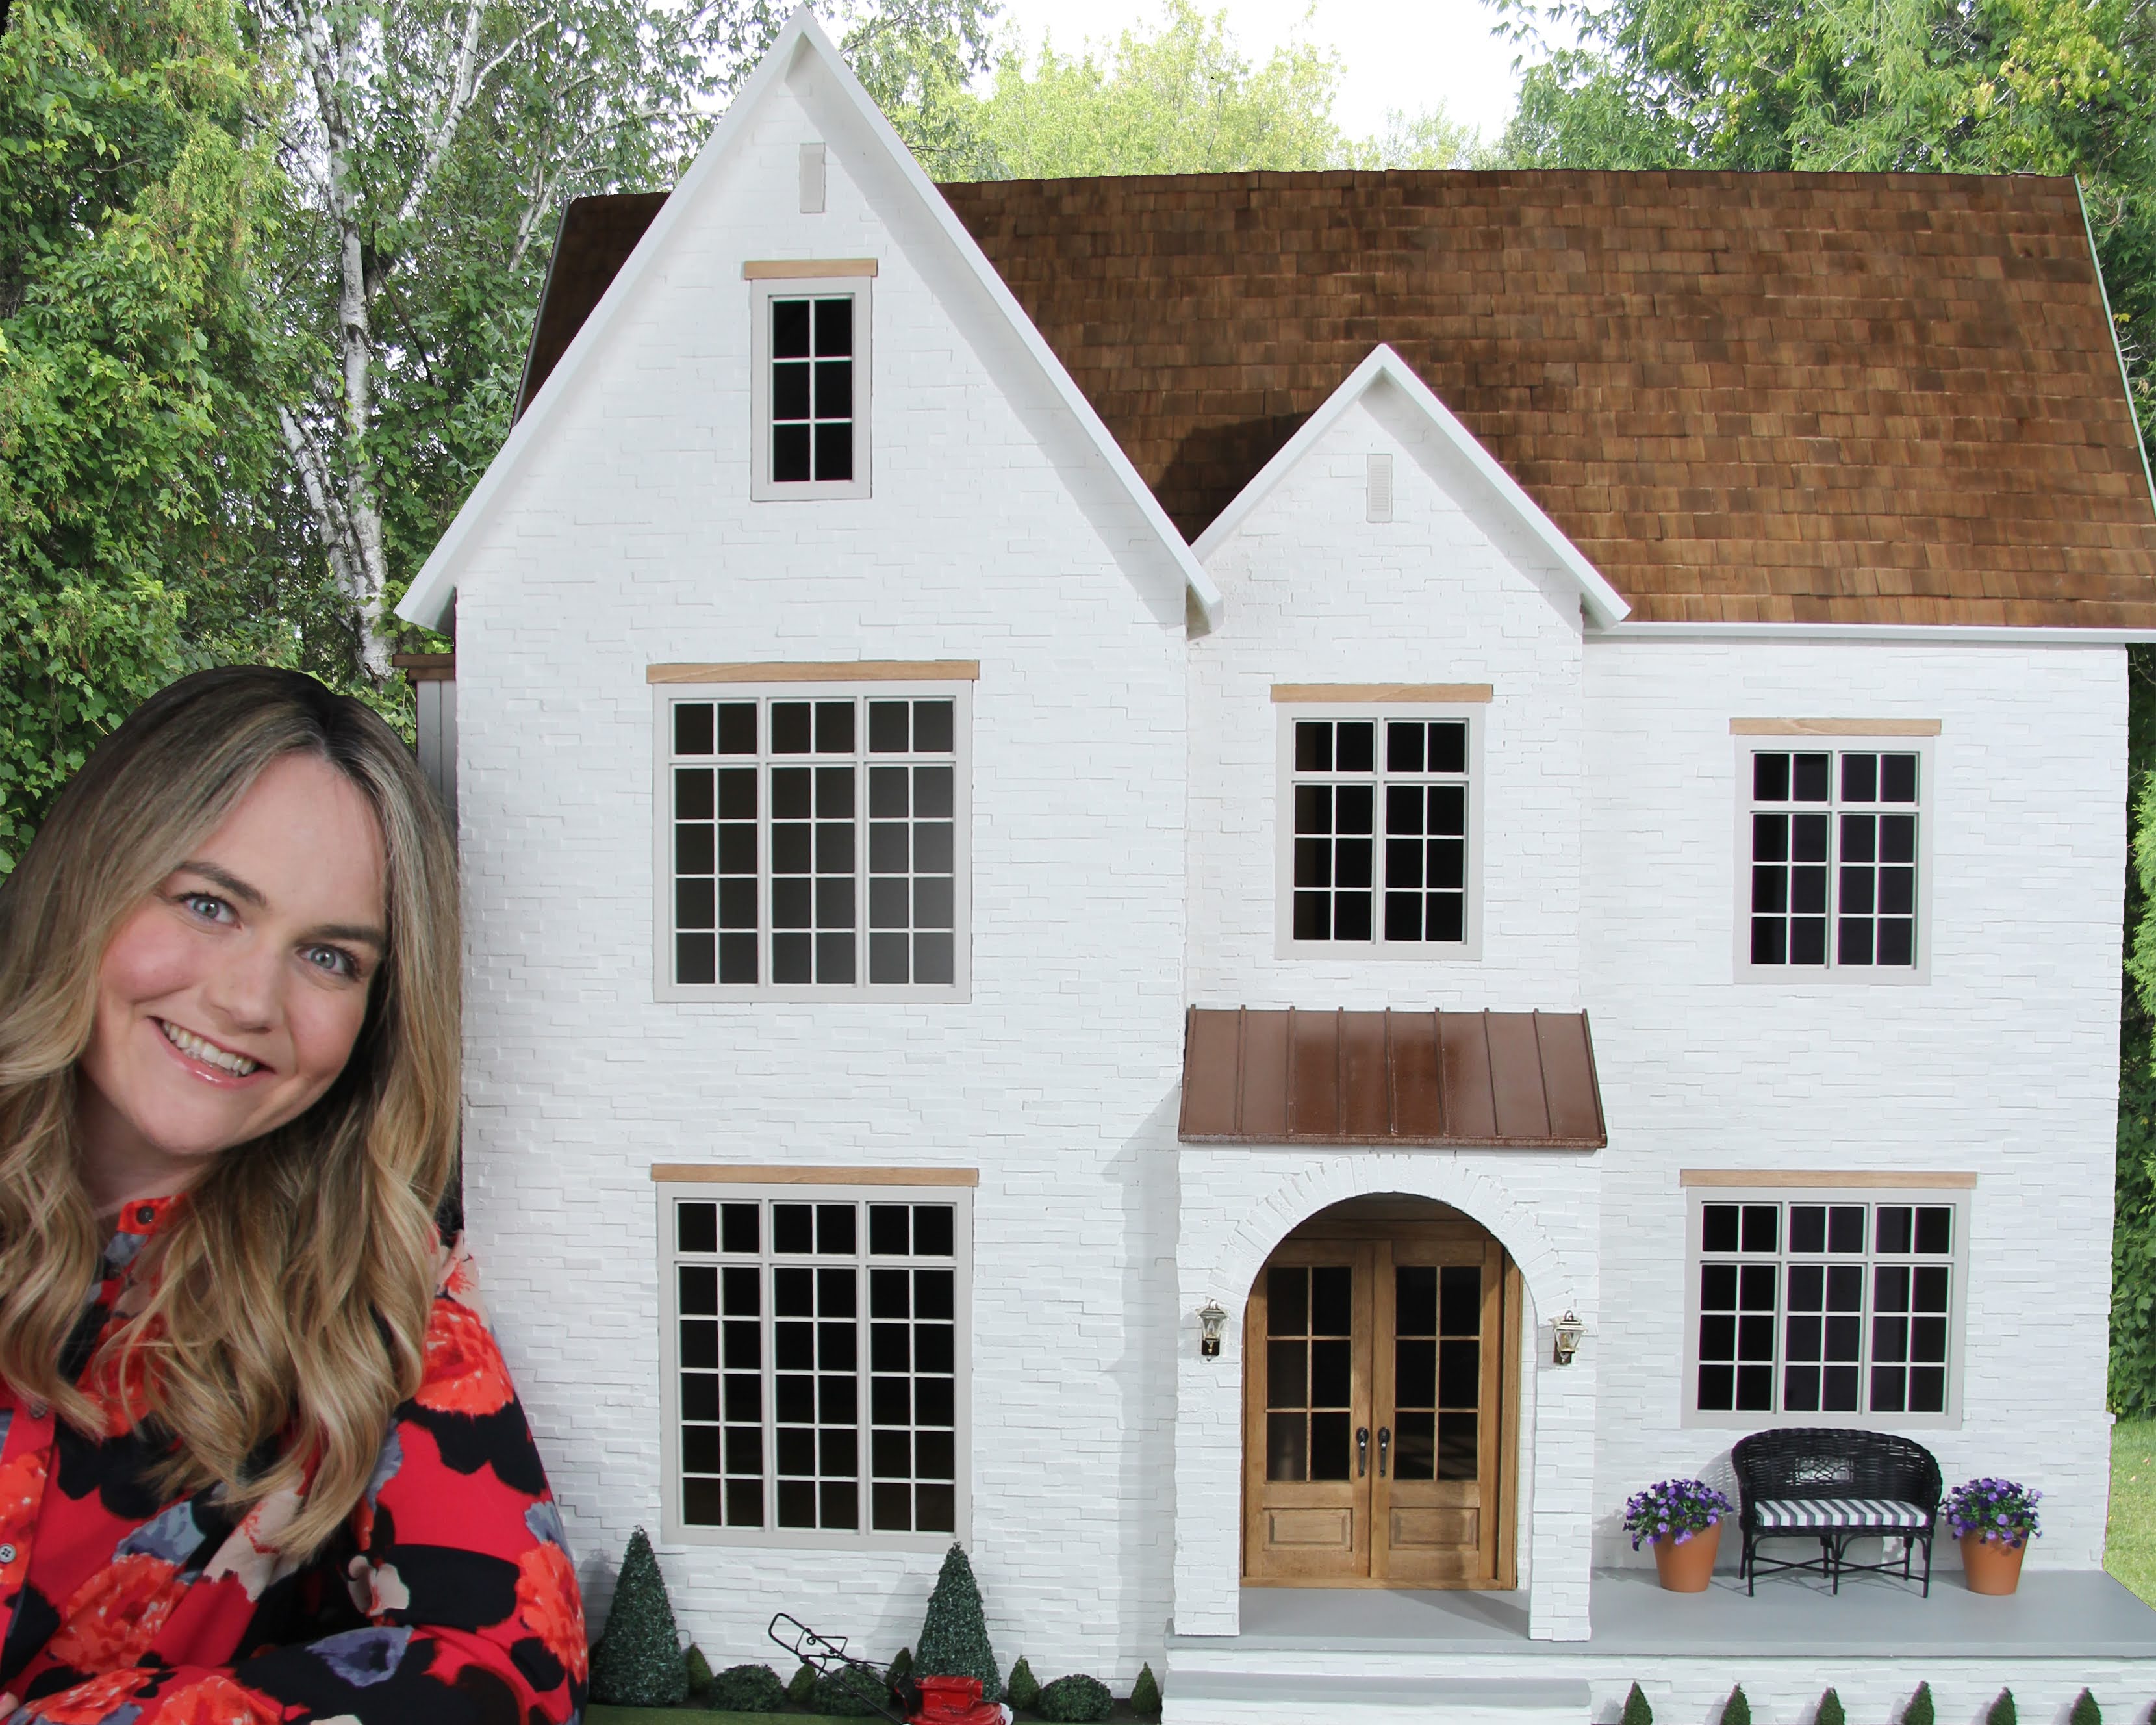
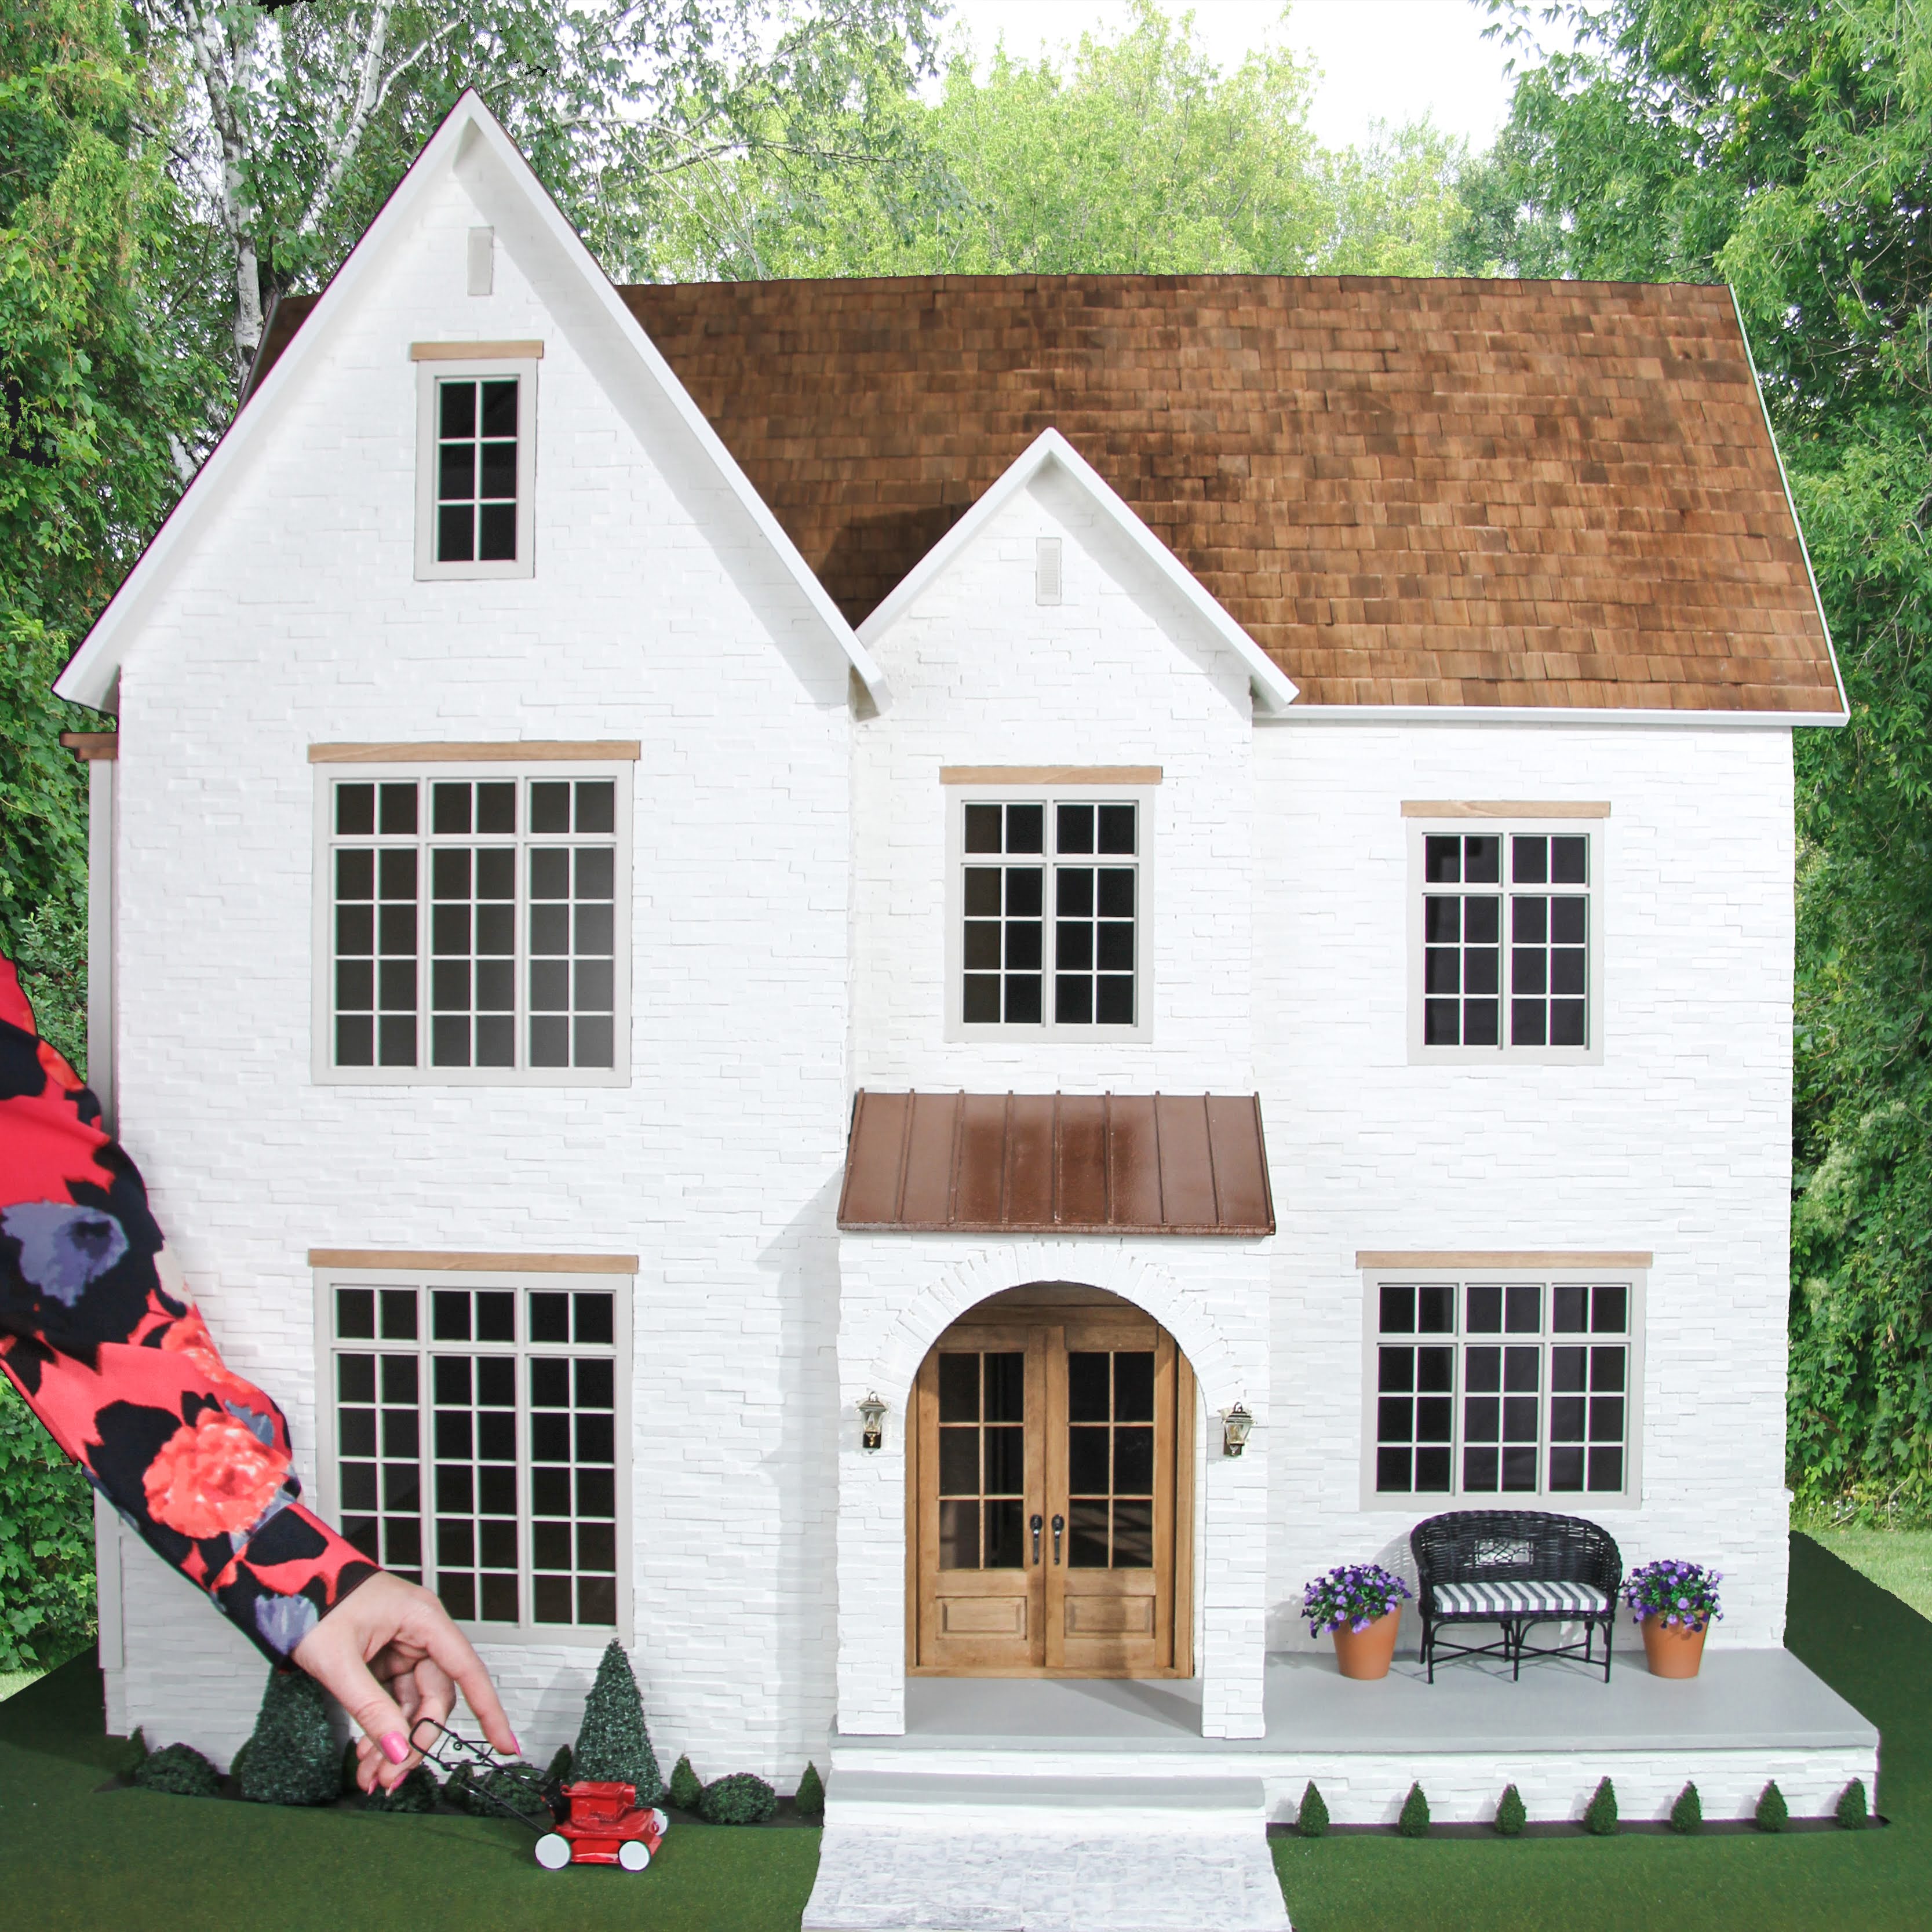
Meet the Brentwood Dollhouse! I'm so very excited to announce my newest project, a brand new dollhouse kit designed by me, exclusively manufactured and sold by miniatures.com! This beautiful 8+ room dollhouse kit is a transitional style and features custom doors, windows, and stairs. All the things I love in a dollhouse!
Update (2025): This product was part of a past collaboration and no longer available. I do not receive royalties, commissions, or other compensation from it.
-How It Started: the reveal, the inspiration and the initial construction
-Exterior finishing, brick, paint colours, and roof
-Landscaping and the base, static grass, garden
-Interior finishing, DIYs, lighting, and staging
Link to the Brentwood Kit.
I've done 7 collaborative projects with miniatures.com over the years and have always loved working with them, but this has been the most exciting yet. I feel like they really are doing everything they can to bring the best minis to market and care about their customers.
My backyard patio collab with miniatures.com

Everything has turned out better than I could have imagined. I'm so proud of what we did together!
How it started...
Do you remember this dollhouse? It started off as my dream dollhouse! It was based on a beautiful house in Brentwood, TN. Transitional style, arches, portico, big rooms, so much space... the list goes on. It was also my first all-from-scratch custom build. This dollhouse was also MASSIVE, measuring over 50 inches wide. I realized soon after assembly I really just did not have the physical space to work on it (or the energy to tackle such a big project). So into storage, it went.


Fast forward and I focused on kits and roomboxes for a couple of years. I finished the Beachside Bungalow kit and started the Victoria's Farmhouse. I now realize how important assembling a pre-made dollhouse kit can be before you make your own custom house. You can really get an idea of what you like and what works.

I decided to kitbash the Victoria's Farmhouse. I like larger mini spaces, so I added an extra 4.5" inches out the side. Once again I couldn't get the transitional house out of my head so I brought in arches in the interior and exterior. I changed out 80% of the kit with all new walls, floors, and roof. That in itself was a learning curve. (And I definitely questioned if it was worth buying the kit at all lol). I figured out an interior that I liked and got pretty far along before I paused to work on other things. I found that while I did like the direction of the house, it still needed some work.

-front porch to decorate seasonally
-closet
-double door (again for wreaths!)
-big windows with lot of natural light
-easy access to film and photograph
-lots of rooms! I feel like if you are going to have one big dollhouse you want it to have space for everything you've been dreaming of like an office, and a laundry room
-strong construction, with 3/8" thick walls
I originally wanted a unique stair placement. I created several sketches, but a lot of my ideas made the house too big:

So in the end I decided that this dollhouse would be the perfect little sister to the Transitional Mansion. I took out the fireplace column to make the build smaller.


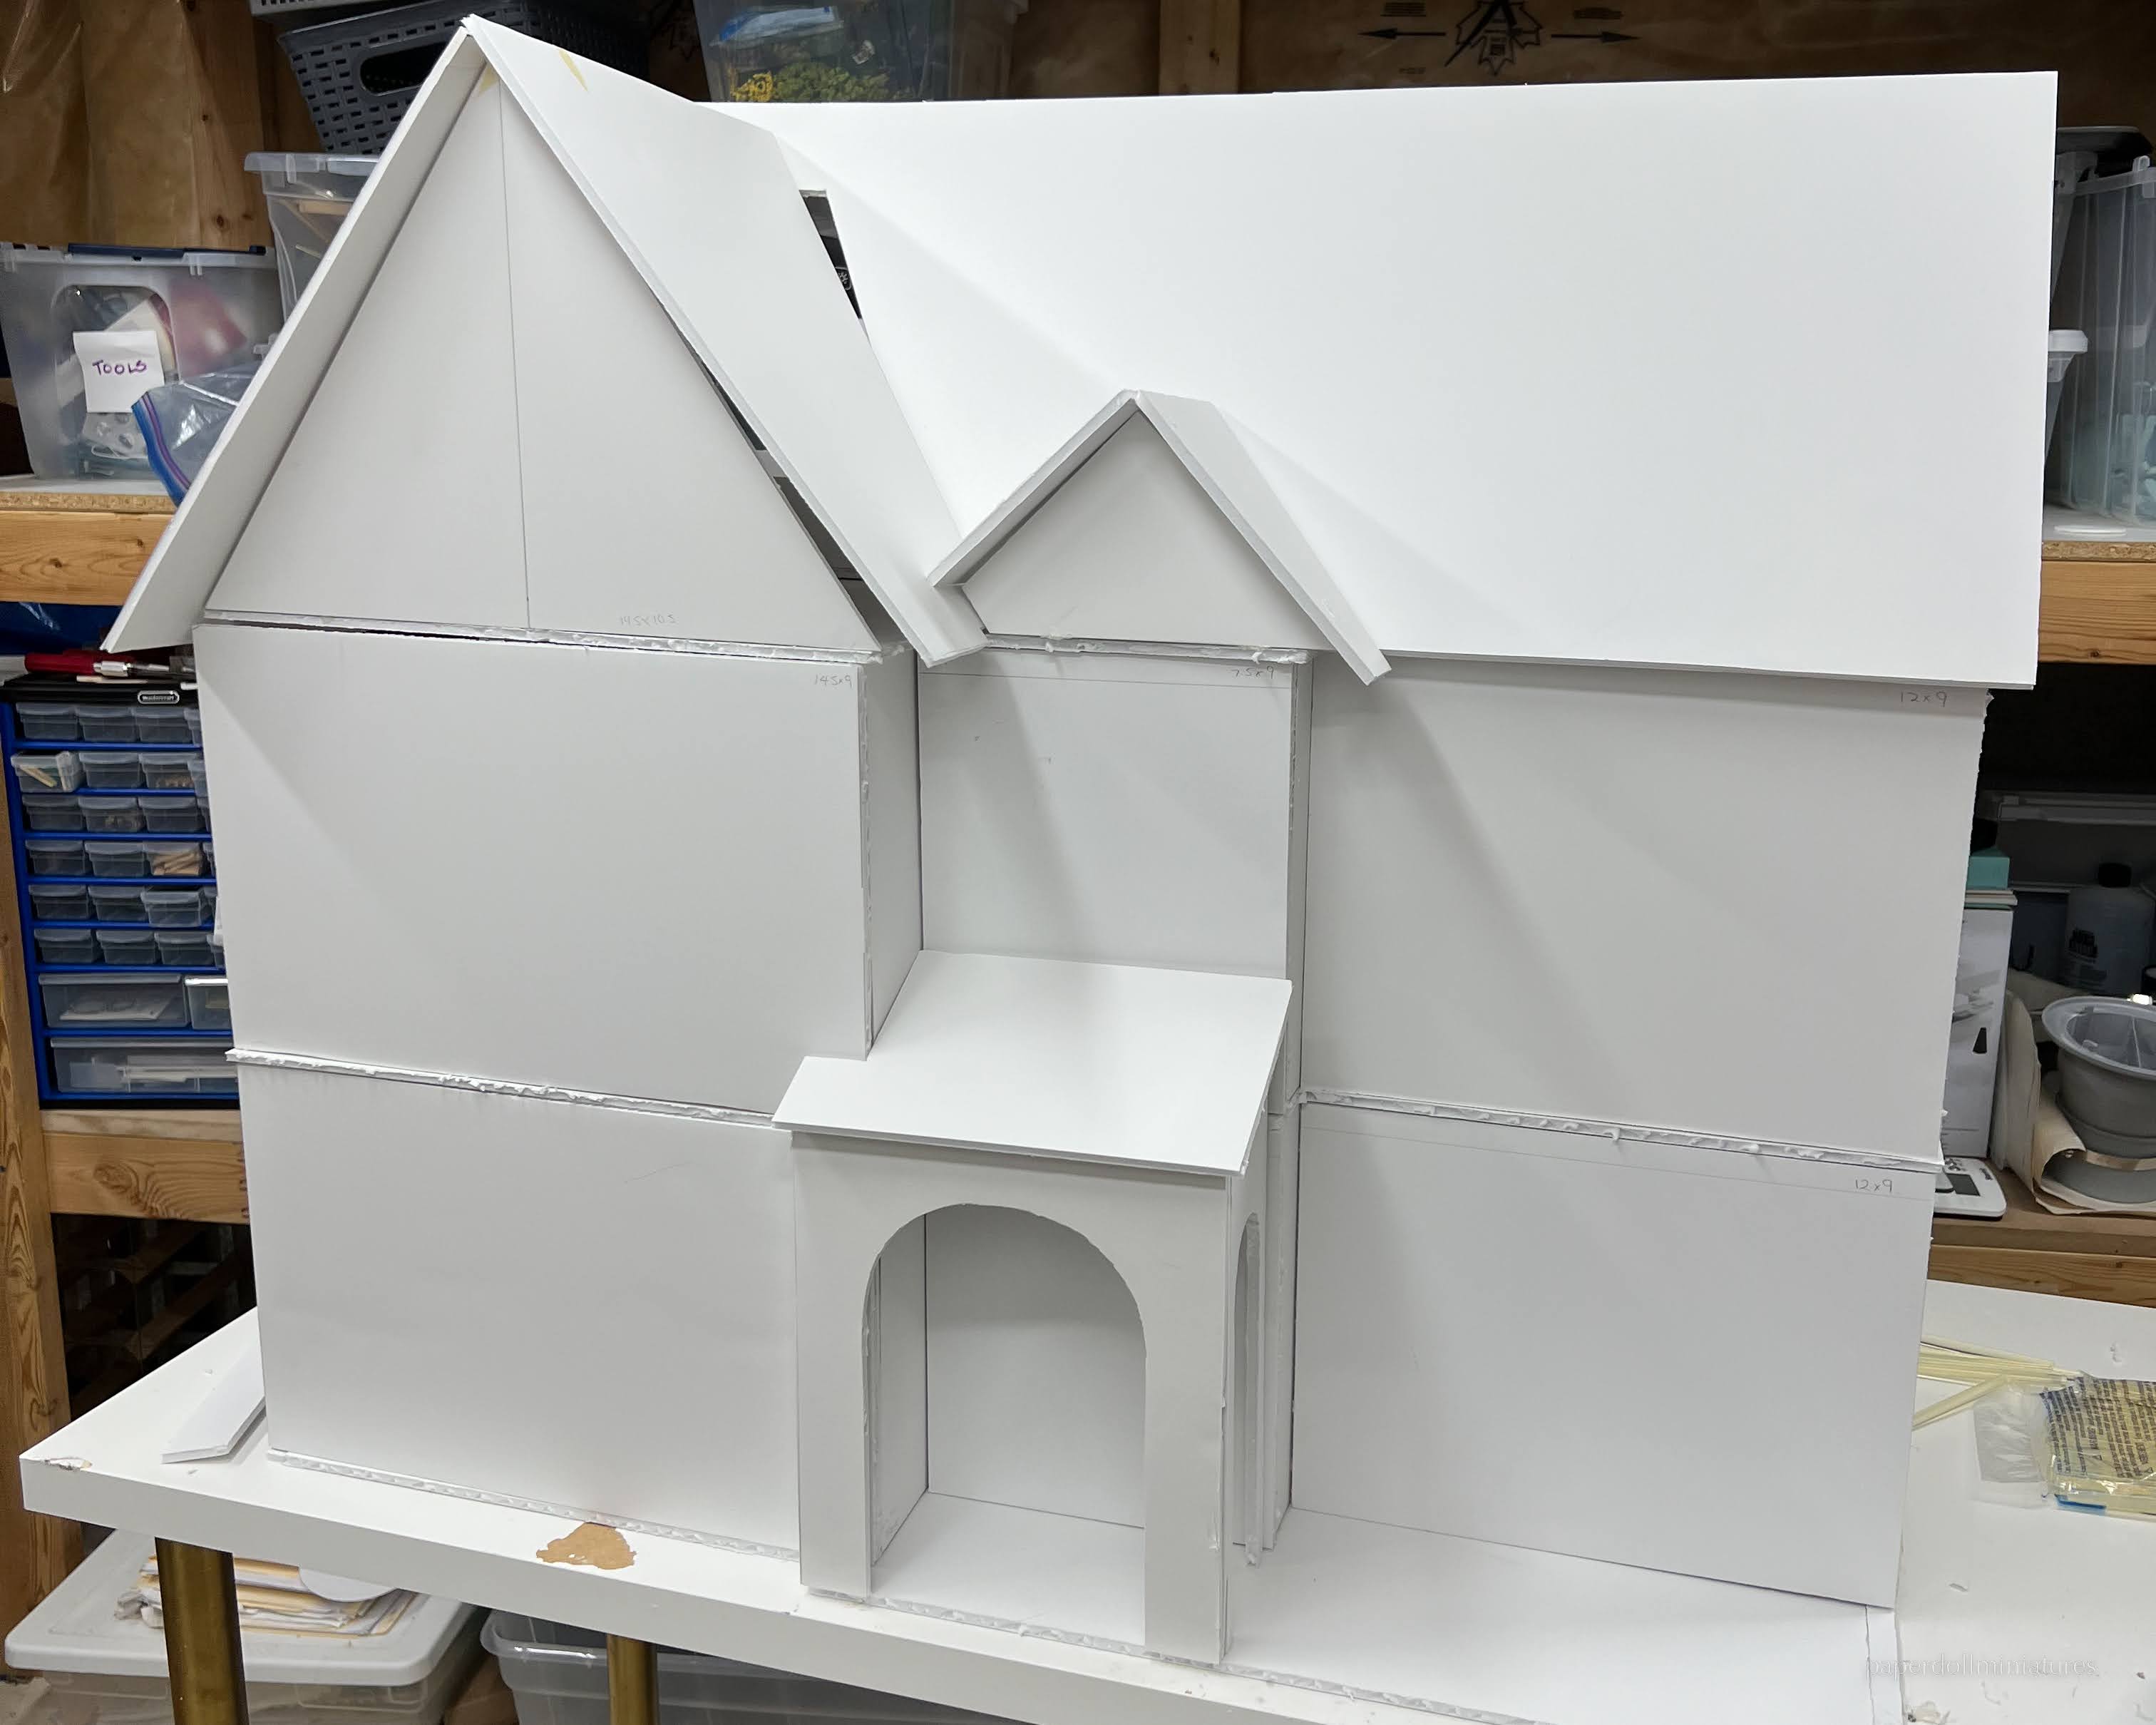
Of course, it's tough to tell what something will look like on a screen vs in real life. My design seemed very Tutor style for a long time with the roof angles (see above). So in December I went to my local craft store and got giant sheets 48x96" of foam board. Foam board is great because it's easy to make cuts and add or subtract.


The exterior:

If you look closely above you can see how the above image has added foam board on levels 1 and 2 to increase the floor-to-ceiling height from 9" to 10"
Originally, the portico would come in front of the main gable like my Transitional mansion did. However, I liked the idea of the portico being optional which changed the placement of the front door.

One of the most exciting things during the design phase was learning the Brentwood kit would be getting custom doors! I had always wanted a double exterior door in mini with windows. (You might remember I bashed one for my Bungalow dollhouse.) The one for the Brentwood is beautiful with 6 pane windows and a bottom panel with layered trim.
The two-panel style has always been a favourite of mine for interior doors, I think they fit most interiors and can really be dressed up or down. And to have it in a double-door style for a closet too is so fun!
To begin I started with a line drawing of both the doors to see how they would look in the kit.


Then I laser cut some prototypes at home. The exterior door is made 7.5" tall (like several other dollhouse exterior doors) and it really makes a statement.
For all the styles, the trim includes a small raised outer edge to add some interest.


I was so pleased when I saw the final designs!

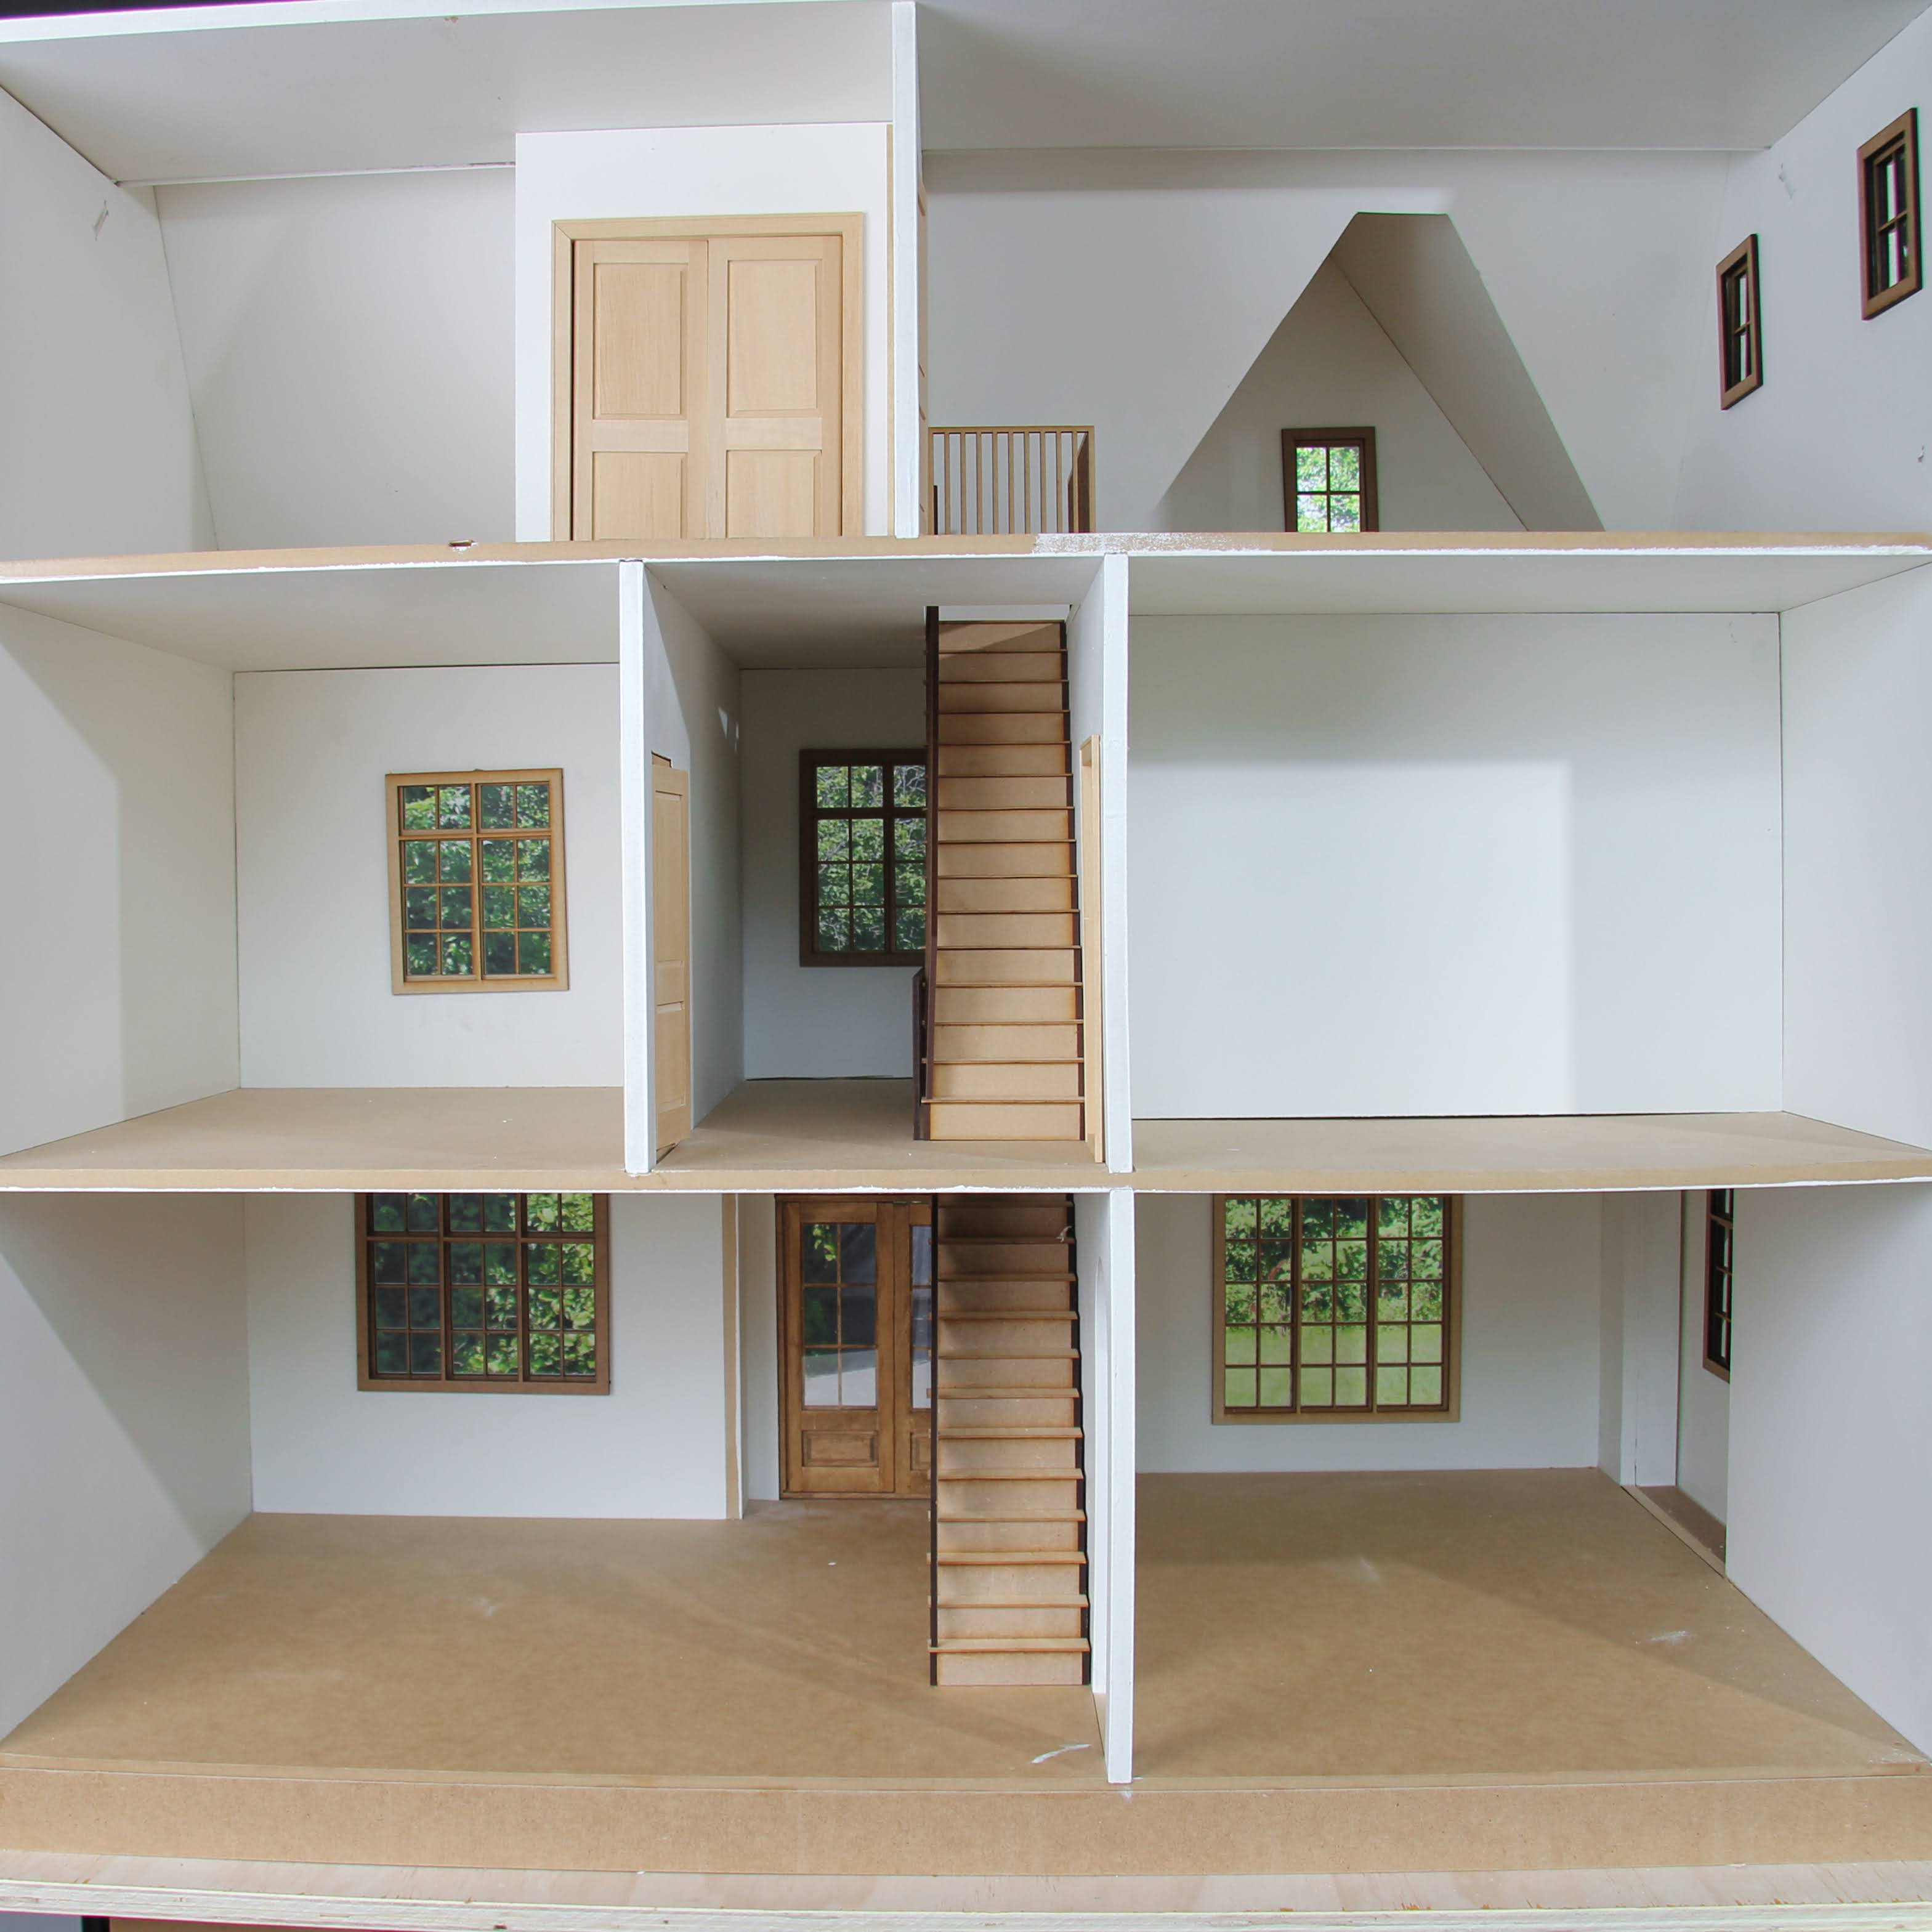
The other custom item for the house was the stairs. I knew I wanted a modern railing. And after some test cuts came up with a style that reminds me of those black iron railings.


The windows: These are the exact style I use in all my projects. They are a sandwich style. With two exterior frames, two sets of inner muntins, and then one sheet of 1/8" plexi. I love how they look and let in so much light, you get really great shadows from the bars in the muntins.

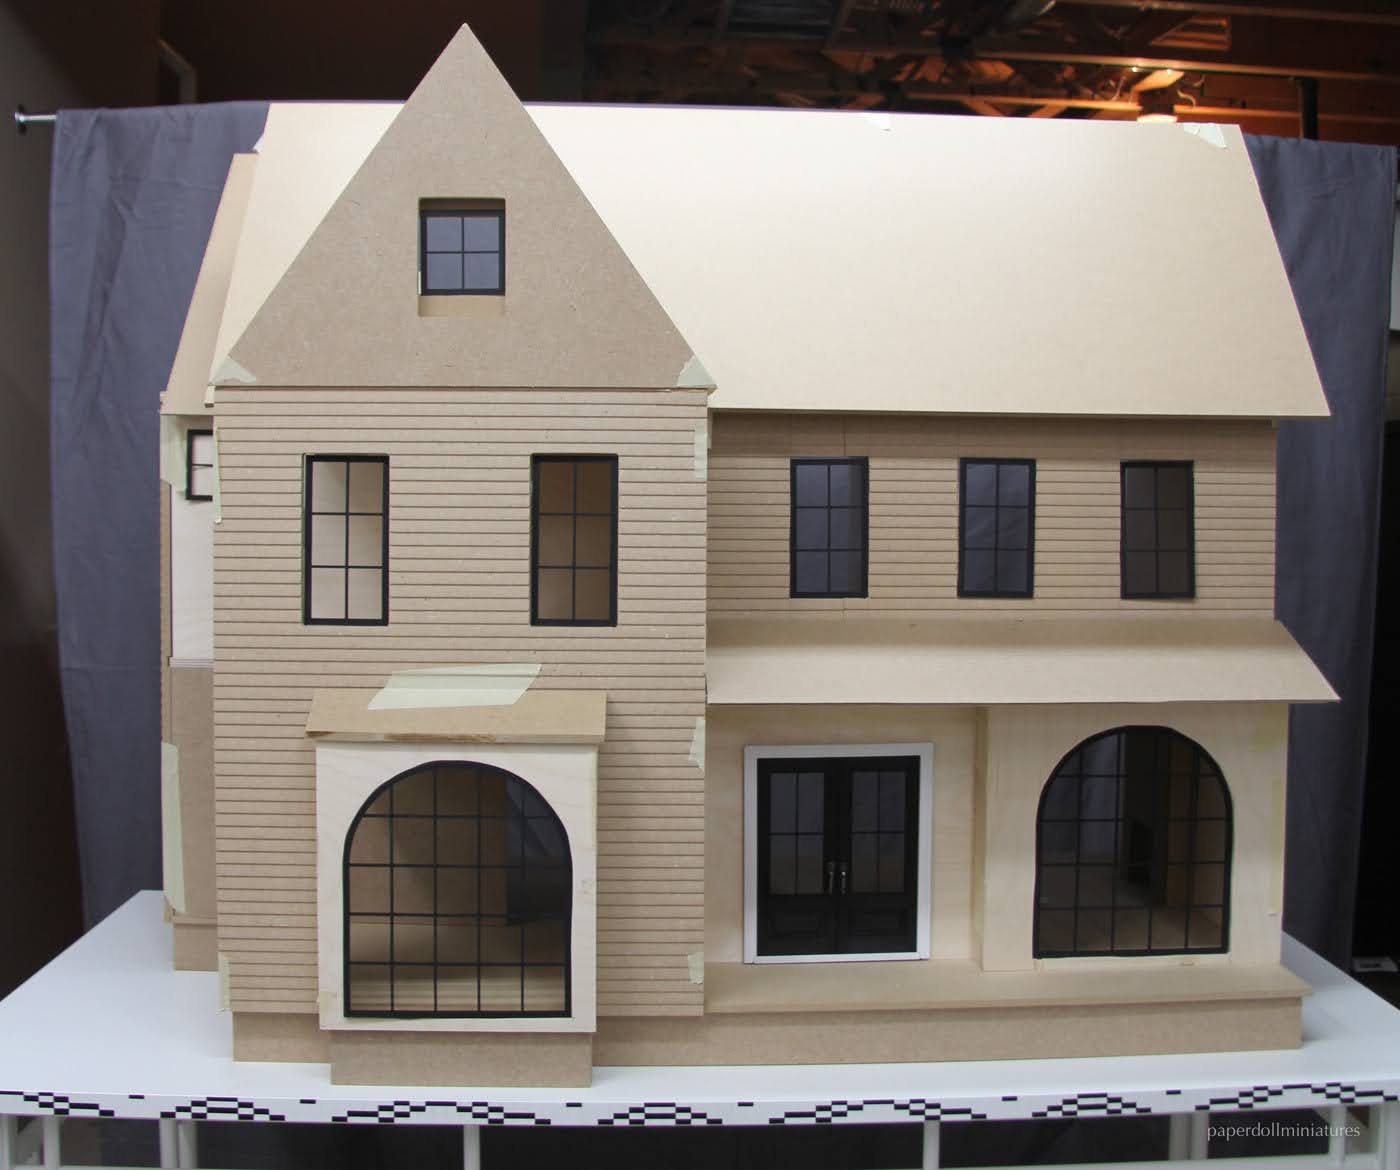
A month or two later and several prototypes were assembled down in Atlanta at the miniatures.com studio by Matt. I learned so much during this process and I would never have gotten the kit done without him. Throughout, everyone I worked with at miniatures.com was really focused on making sure the customer had the best experience putting together the kit. And I think that it shows. Everything has a groove or a slot to go in.


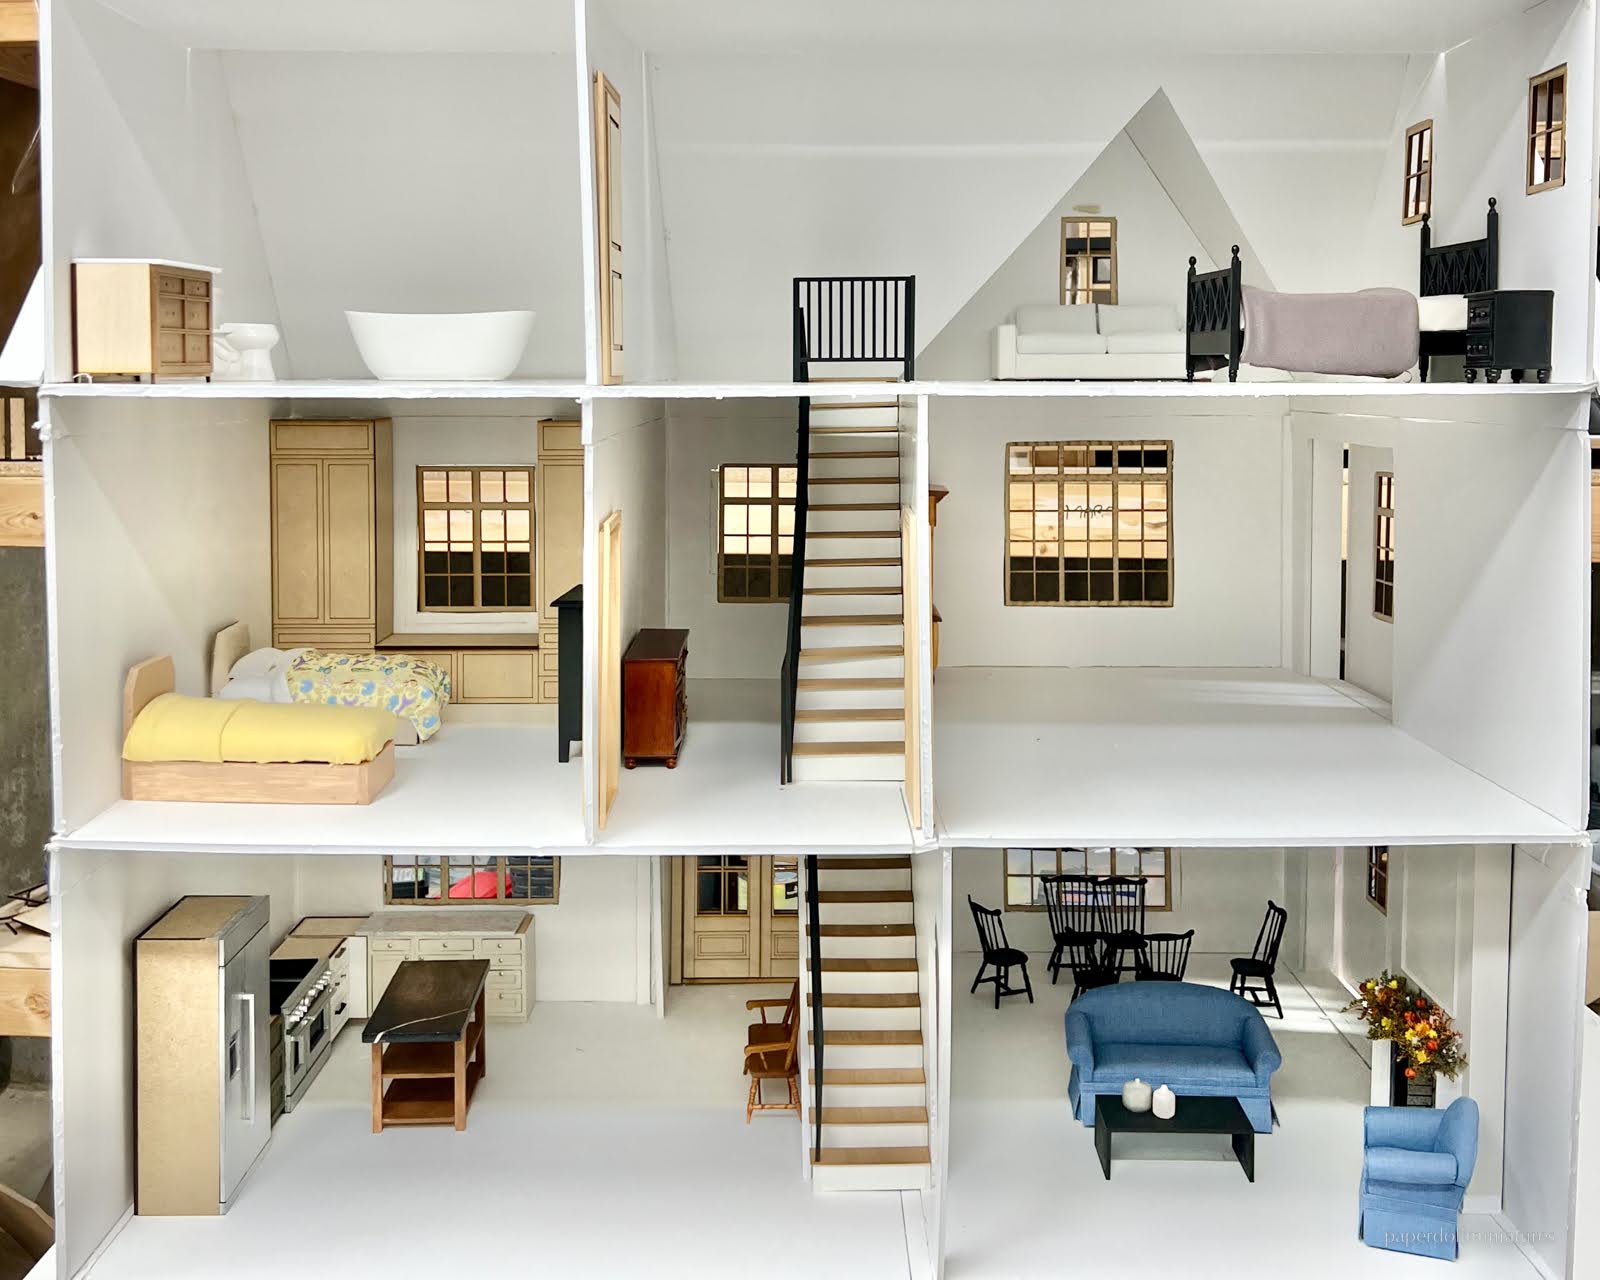
Here is the final interior layout of the house! I made sure to keep my kitbasher heart happy, and so there are a couple of customizations that can be done when building. 1) The 1st level stairs have the option to be open underneath if you choose. 2) You can divide the largest 2nd level room into 2 (I purposely added a nice 3/8" mdf wall to separate, and added two doors). 3) You can also change up the 3rd level floor plan by swapping the walls so the closet is either in the room with the stairs or without.
And for someone who really likes to kitbash, you could change that closet area into a full view walk in by moving the double doors to open up into the bedroom. Or move the closet down a level into one of the 2nd level rooms (that would require cutting the closet wall by 1"). Both are small changes to the kit.


Thank you for reading! I'll be back with the exterior finishing next week. I'd love to know what you think of the house! For real-time updates follow me on IG stories, I'm about to start the interior.
Wow, Kristine! I love this house! I love the double doors on the front, (I have double doors on the front of my house.) I love the closet, since I've acquired some awesome outfits and have nowhere to display them currently. This is such an attractive house! Can't wait to watch you as you work on the inside.
ReplyDeleteThank you! I don't know who you are but thank you! I can't wait to do the interior. I'll be doing that in Sept. (Although the blog will likely be behind a month). I'm really excited to put everything in and stage it!
DeleteSuch fun reading this post to get the big picture of your development process. While I still have a dear place in my heart for your transitional house, I certainly understand space constraints. I think you’ve done a fine job with this Brentwood. It’s got spacious rooms and just the right number. The style is unique and interesting without being “old fashioned.” It’s fresh and contemporary. Such an achievement for you. I look forward to future posts with more details.
ReplyDeleteThank you! While I loved that house, I know it will never get finished. And I like to think the Brentwood takes all the best parts (although I do love the fireplace chimney on the front, I really wanted that here somewhere but it didn't work out). I'm so glad you like this new build and the space inside it. I can't wait to get to the interior next.
DeleteI am so excited for this kit to arrive. It's so beautiful and I know what you mean about the huge house being so much that it'll never be finished. But man's reach must exceed his grasp or what's a heaven for.
ReplyDeleteI can't wait to see how you finish the interior.
Thanks Sheila! Haha it's true, I had big mini dreams for it! But I think the Brentwood takes so many of the good parts I'm happy to walk away from it. I'm so excited to see what you do with yours! :D I'm looking forward to doing the interior and coming up with ways to fit everything in I that want!
DeleteSuch a wonderful house, my favorite house has always been the Beacon Hill…but now I’ve found a new favorite. I’ve ordered mine and I am super excited to get started. L Jeffers
ReplyDeleteWhat a fantastic house, and what a great idea to be able to get it as a kit. I love the porch and the double door, the closet, and the stairs with the modern railing. Also the rooms are big which isn't often the case in dollhouses. I'm looking forward to seeing your next posts.
ReplyDeleteGeneviève
¡Una bonita colección!. Tienen todas una preciosa estructura. Me encantará ver el final de tu nuevo proyecto.
ReplyDeleteI would love to see a picture of the inspiration house! This one reminds me of one that I see frequently in Franklin, TN! I can only aspire to make something this amazing!! Well done!👍🏻
ReplyDeletethank you! The inspiration really was a bunch of houses in this style :D
DeleteI LOVE this house and plan to order it! I want to expand it so that the second story rooms have en suite bathrooms which would mean the 1st story will be bigger .. maybe a separate dining and maybe a den or office. The room additions on miniatures.com only expand the bottom stories. I’m new to building kits do you have any suggestions? It is hard to find dollhouses that have en suite bathrooms. It is typically stairs up the middle and rooms on either side.
ReplyDeletethank you! It's a really big dollhouse!! Honestly you might be able to fit en suite bathrooms in it as is on the second floor. The rooms are very spacious and could be divided to fit a bathroom. I think you could add a faux wall on the exterior wall if you needed to gain access or something on the left side. Did you see my finished interior? I have a bathroom on the second floor that would be easy to make it seem like an en suite with a door.
DeleteI've just posted the interior photos here on the blog. I don't whether they really show enough how big this house is... I'll work on taking a new photo of the entire back of the house. The kitchen I'm working on for it should be done next month.
DeleteCan you please share where you got the stair railings??
ReplyDeleteHi! They came with the kit!
DeleteThey are part of the Brentwood dollhouse kit. Right now the stairs are only sold as part of the dollhouse kit and not on their own. Maybe let miniaturescom know you are interested ;)
ReplyDeleteAwesome work, and lovely results! I wonder how could I access the front room, in case I add a wall on the second floor like you mention? I notice two windows (one on each floor) on one side of the house. Can that wall have hinges in order to access it?
ReplyDeleteI hope I am making sense.
Thanks in advance!
Hi! Yes the side panel opens with hinges! It comes with the kit.
DeleteI bought this kit and there were no shingles in it. How many do I need?
ReplyDeleteAmazing! So glad you got one before it was discontinued! I went to my notes and I'm pretty sure I suggested 1300 shingles (this gives you some extra). Or 1x 1000 bag + 3x100 bags. It depends on who you buy from. I prefer RGT shingles or cedar shingles from the Little Dollhouse Company in Toronto. I think a batch dye method is best, but I also used Saman stain. You just have to be careful staining after they are glued on, it can look patchy. Hope that helps
DeleteI cannot find the kit in stock anywhere:(
ReplyDeleteHi! I know :( Greenleaf technically has the rights to it after miniaturescom closed. It's on their website. You could email them and ask if they plan to make the kit in the future. Otherwise, for now it's no longer manufactured. I'm sorry.
Delete