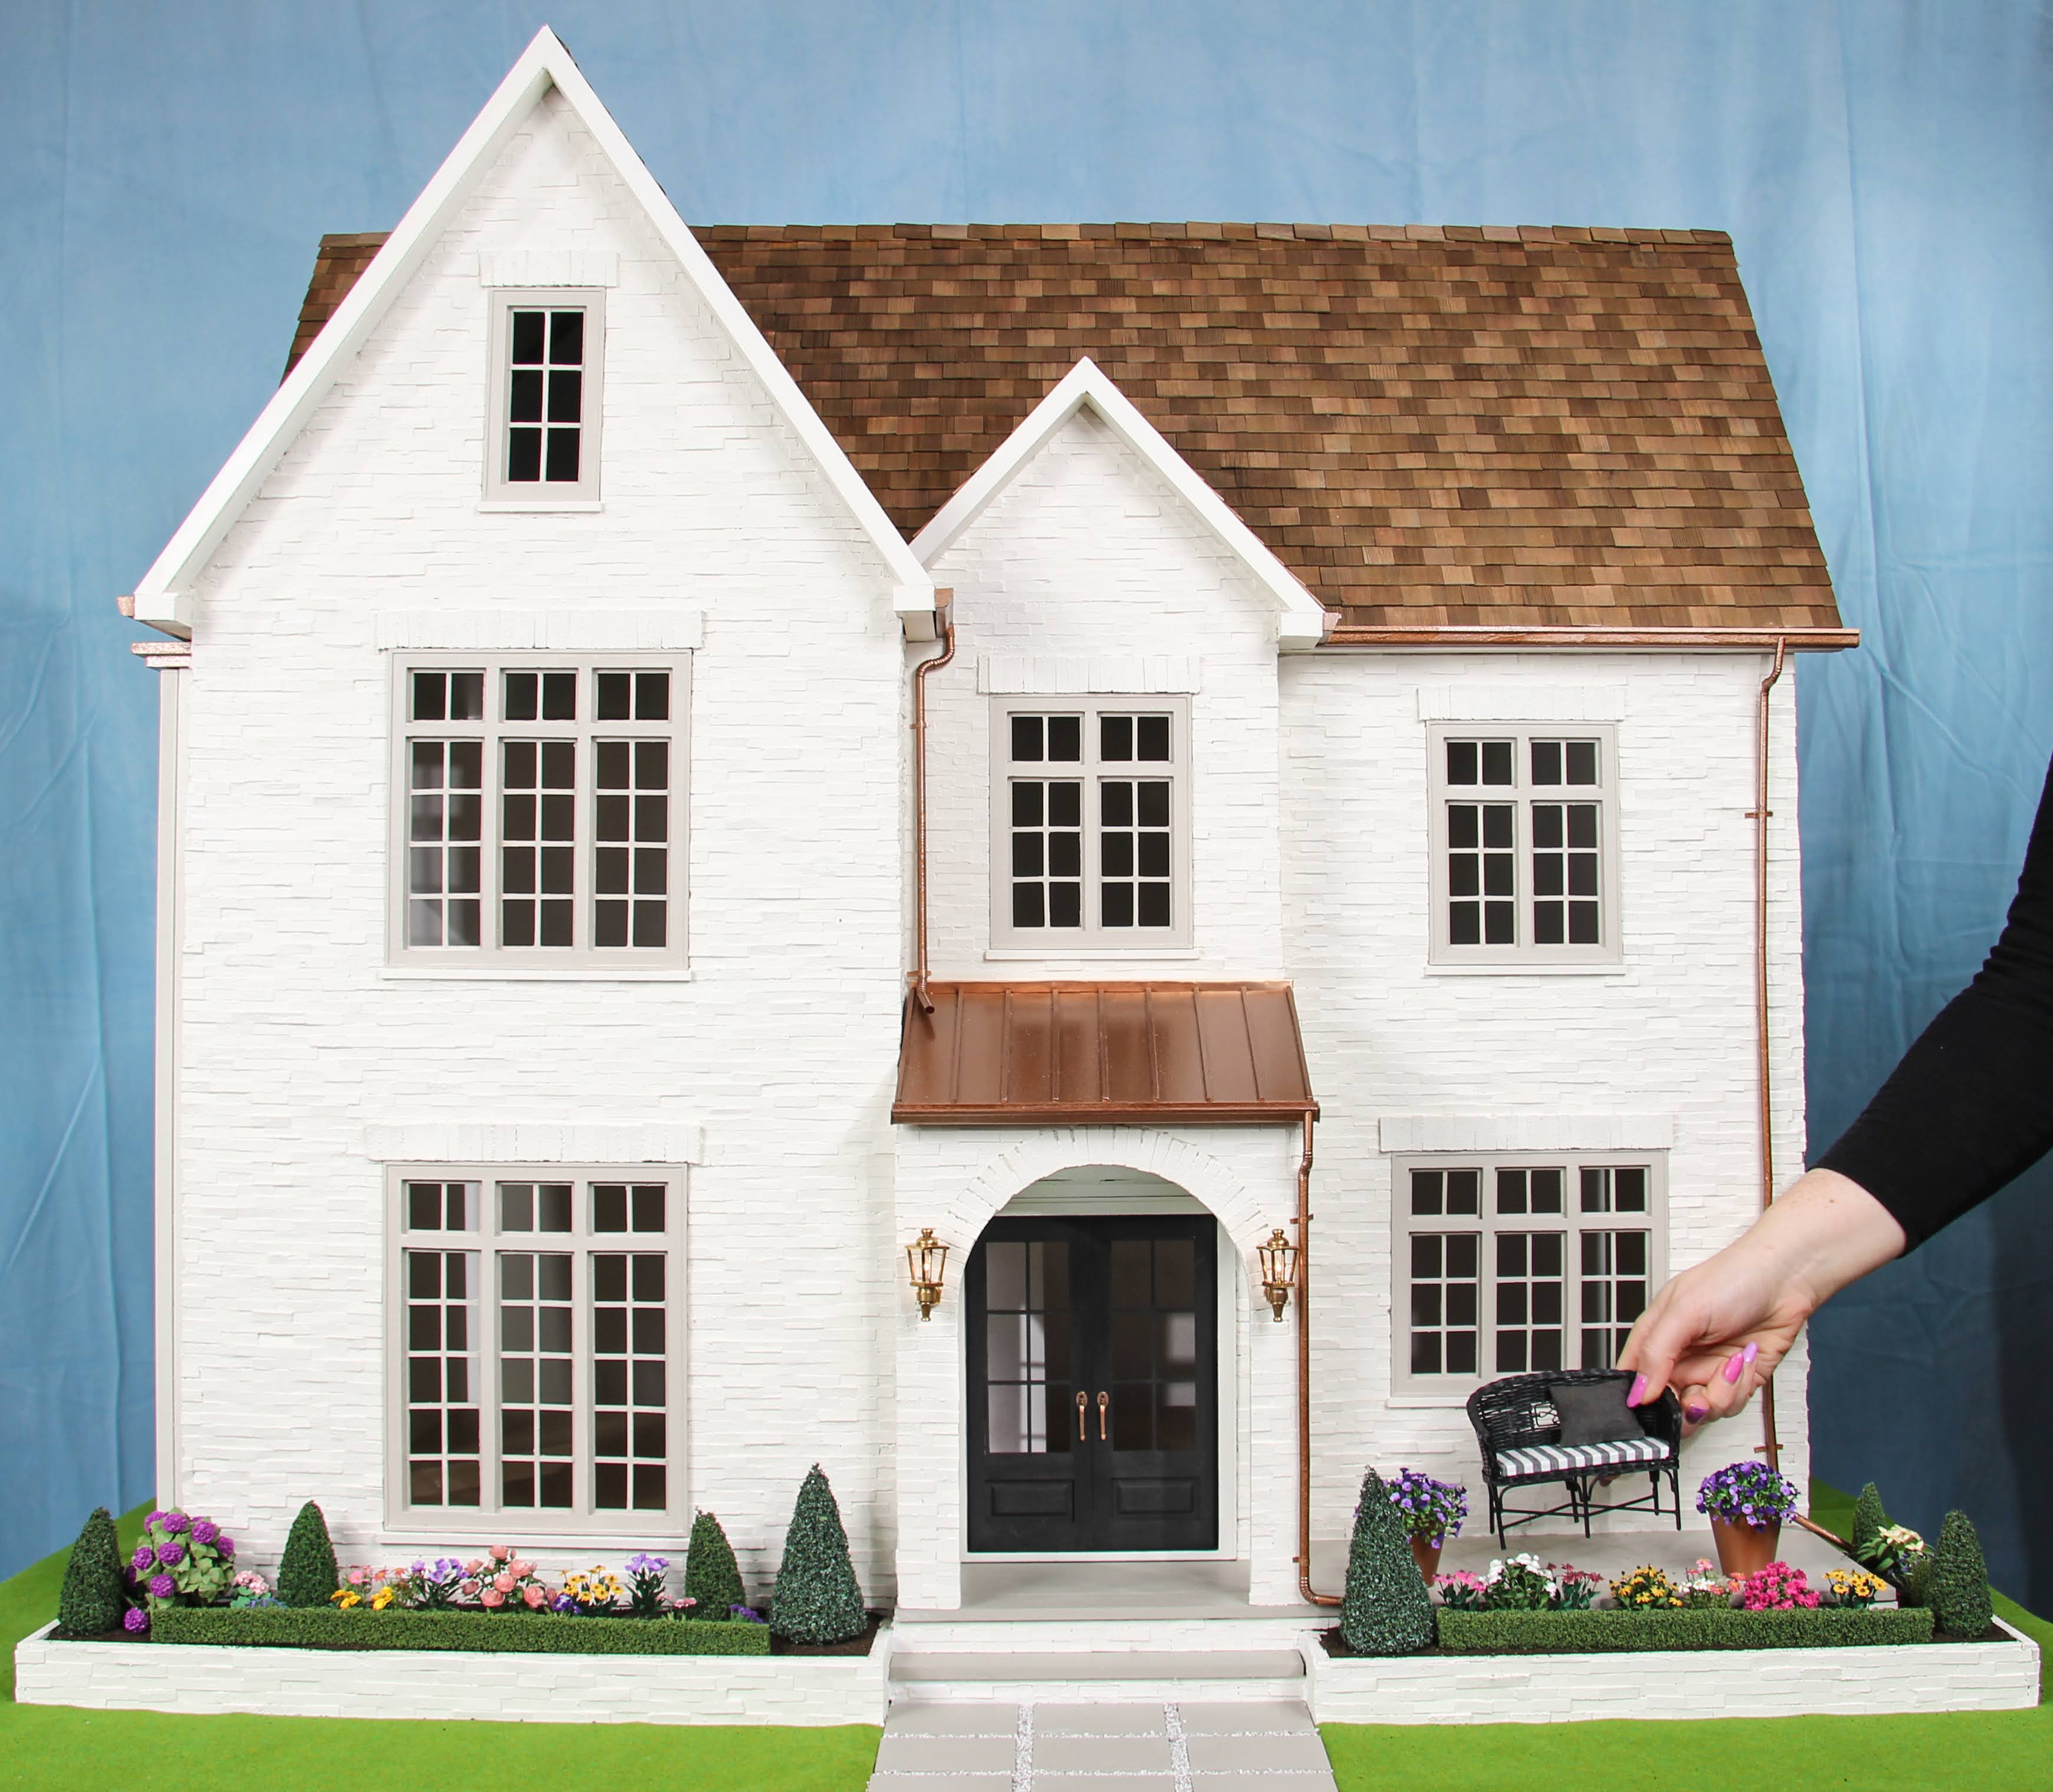
Another Brentwood Dollhouse joins the neighbourhood! Meet the Brentwood Dollhouse 2.0! Designed by me and made by miniatures.com. This post will go into detail about the exterior of this dollhouse and also touch on the original exterior since they share so many similarities.
Update (2025): This product was part of a past collaboration and is no longer available. I do not receive royalties, commissions, or other compensation from it.
Additionally, you can check out my last bricking post for more, it's kind of part 1 of the exterior.
I'm so thrilled to share that the first 50 limited edition kits made in the USA have officially sold out! Thank you to everyone who purchased. I can't wait to see what you've done with your kits and how you style them. Be sure to share photos! The re-vamped kit is available here.

The second revamped edition of the Brentwood kit and has a few small changes from the OG design. The windows are now factory-made like the doors which means they feature the same beautiful trim. (That said, I do love the 1st addition double layered windows too, so if you got that kit I think they are fantastic and love them equally). As well the stair railings are now made from wood and not laser cut (not too big a change except you can stain them).
The two changes I am most excited about? The mdf wall and roof pieces now have mitred cuts for even easier assembly. Yay! And a very fun change we were able to add 2 additional windows on the sides of the house.
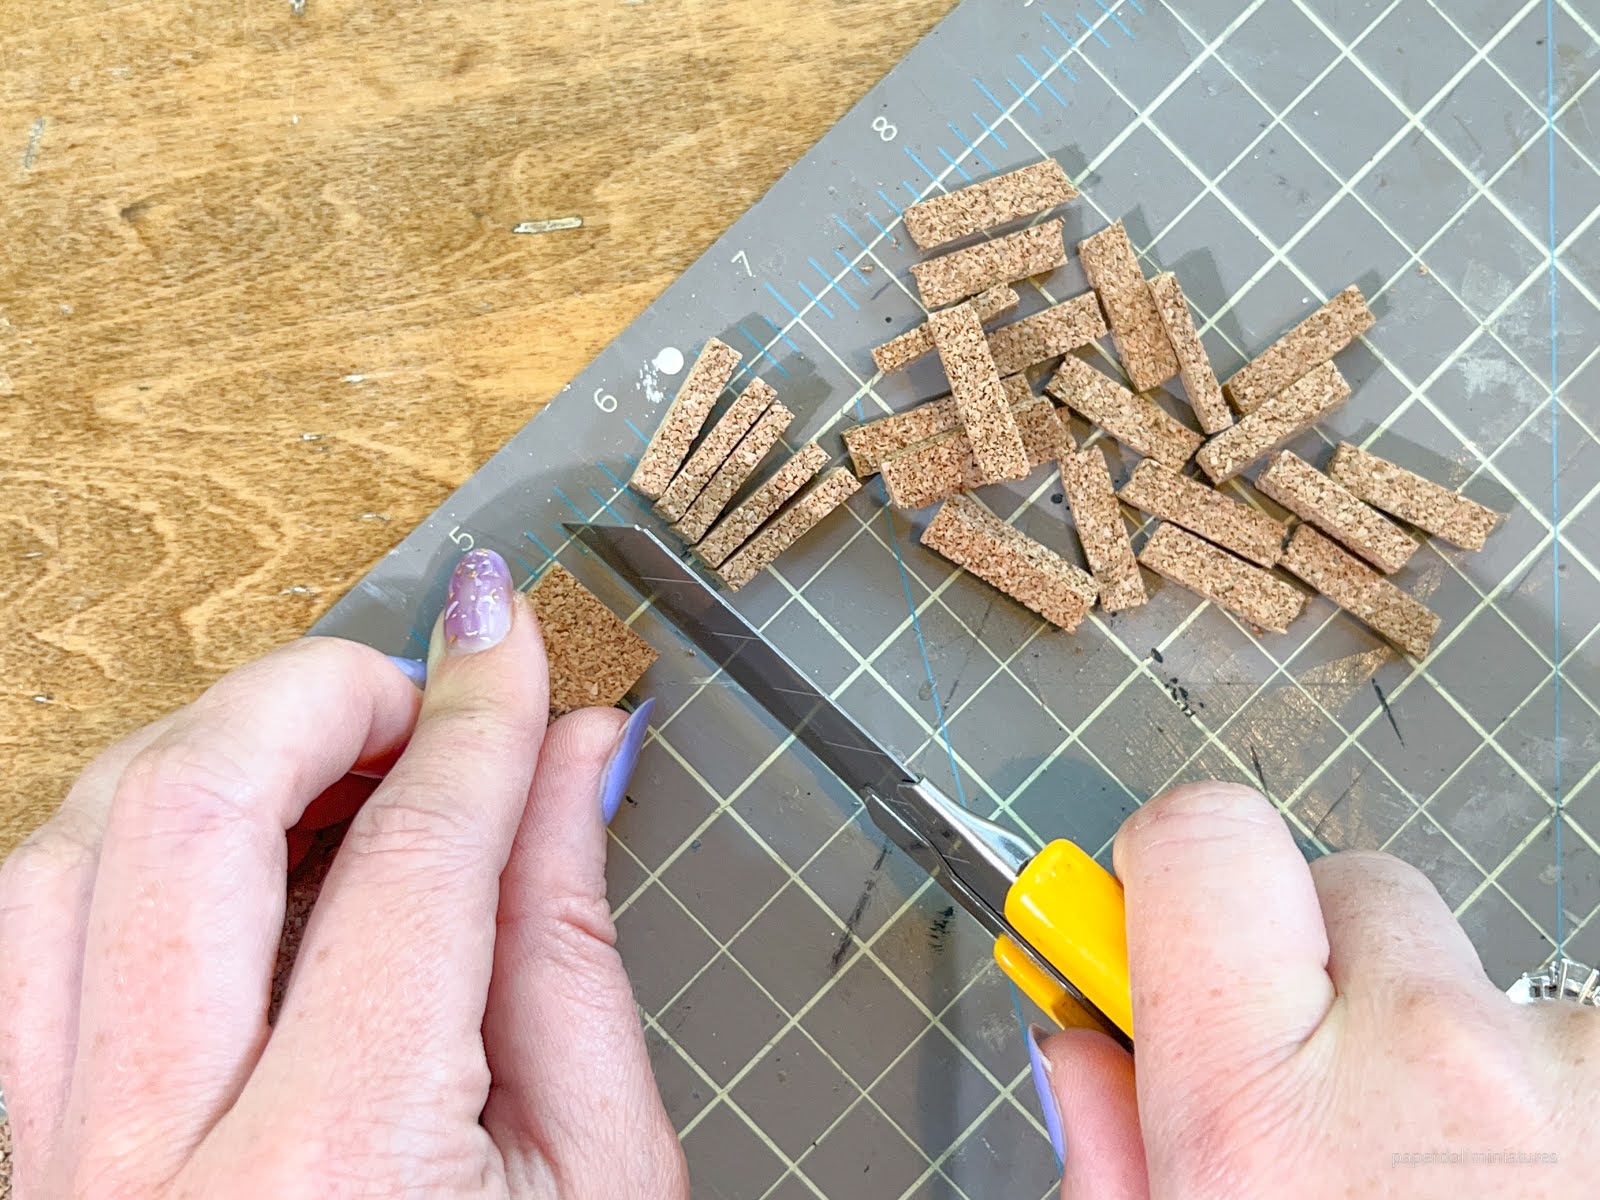
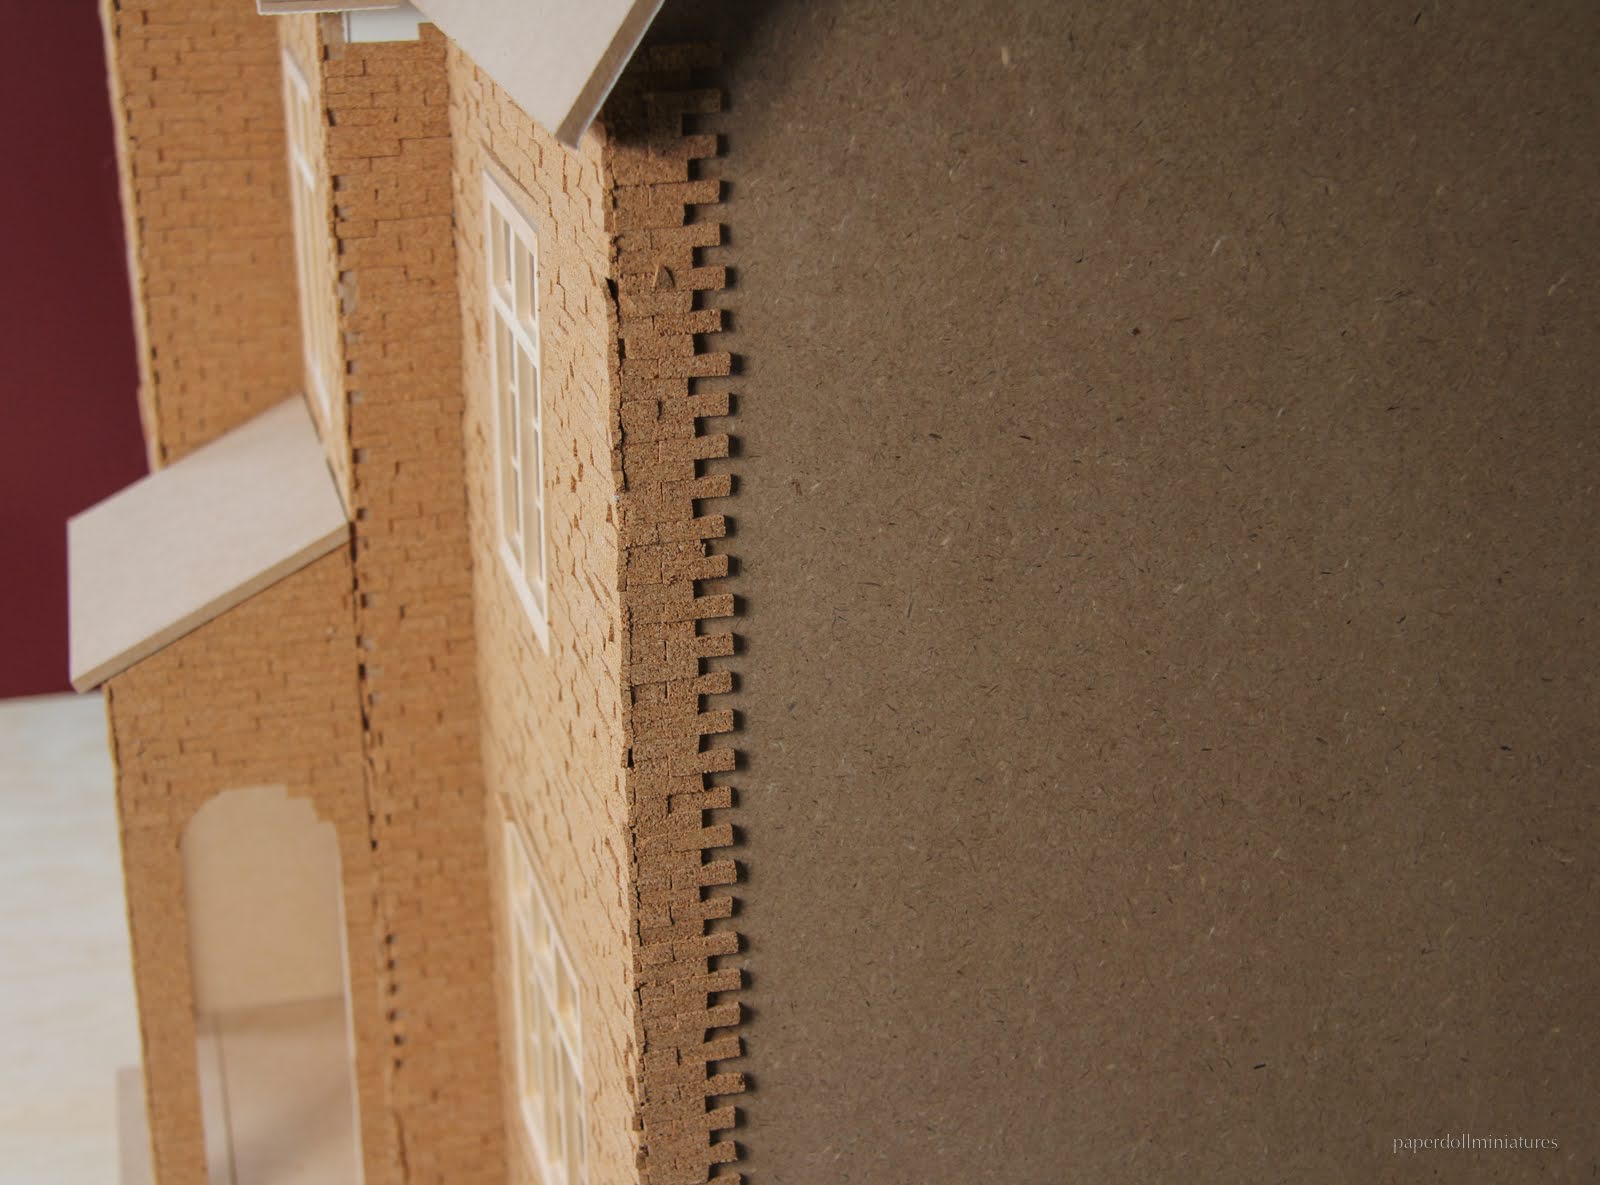
To me the Brentwood Dollhouse kit always reminds me of those white painted all brick homes in the Southern USA. So for my second Brentwood build, I went with the white brick again using my cork sheet brick method.
This time I went a bit darker and cooler with my paint choices. The door is black, the windows grey, and I removed a lot of the wood elements from before. Now there are rows of bricks above the windows instead of wood lintels. I added new porch lights that are just a bit bigger and more proportionate for the house too.
I added more copper accents with new gutters along the roof and some copper flashing above the portico roof.
The garden features a raised bed with bricked walls and I did modern stone slabs for the pathway.

Let's get into how it came together!


Very important to note, Sherwin Williams flat/matte paint was awful on the cork, I definitely would suggest getting the paint colour matched at Home Depot with the Behr brand. The Sherwin Williams paint cracked and was thick and not good. I went back and got my usual Behr. Always do a test. The Behr only took 2-3 coats, whereas the Sherwin Williams you had to do a lot of thick coats and it still looked porous.


I was then able to add my gutter lengths easily.

The downspouts are made from plastic drinking straws. I first bent and glued them to the shape I wanted. Once dried, I spray painted them with copper spray paint. To attach the downspouts to the house I made little tabs: I spray painted a sheet of paper with the copper paint and then adding double sided table to the back. Then I cut into tiny little strips.


I also added a piece of copper flashing at the very back of my portico roof by wrapping a piece of stripwood with copper sheet #9064.

Landscaping:
I also cut 1/4” x 1.25” mdf walls to go around my raised garden and applied the same bricks around the outside as the house. I then filled the interior with cut up pieces of sponge and layered model soil powder on top. Used a collection of paper flowers and squeeze me bushes #9736, trees #1715 and #9735. Around the perimeter I added two strips of Edge Hedge #949.
Finally on the deck I added a pair of the medium tapered “Terra-Cotta” planters #40410 which I spray painted copper and filled with paper flowers from my collection.


Lighting:
The finishing touch was adding these new Brass Carriage Lamps #2614. They are the perfect size for this house and I love how you can see the bulb. I decided to dull down the shade of gold so I added a wash of copper metallic acrylic paint.
I also added a piece from the LED light strip Cool White strip #95301 under the portico roof to further illuminate that area above the front door. The connector piece #9239 allowed me to tie it into my dollhouse wiring.


Doors:
I spray painted the Gun Metal Handles #65603 copper before adding them to the front door.

You can find all the items I mentioned above at miniatures.com by searching the name or item number. What do you think of the new exterior?!
I love how it looks! The copper is so warm! And the roof is wonderful. I keep bookmarking your brick tutorial so I have it when I need to do a fun modern exterior.
ReplyDeleteThank you Sheila! I love the copper, I'm tempted to add some more copper elements to the first Brentwood portico now. I love the cork brick too, just really be careful with the paint! It's one thing I regret not testing first!
DeleteHello! I'm new to dollhouses and miniatures and was delighted to find your blog. What an amazing dollhouse! I'm in awe and so inspired! Your drinking straw downpipe is the best, and all your techniques are so cool!
ReplyDeleteThanks so much!! :)
DeleteUn trabajo fantástico!!!
ReplyDeleteHi! What color/brand did you use to make the roof shingles that color? It looks amazing!
ReplyDeleteThis one is sort of a mix of Whole wheat and a bit of Colonial by Saman. Idk if I added anything else. I'm basically stuck if I have to fix it. Sorry I couldn't be more helpful. I think the dollhouse shingle dye in brown is amazing tho. And also I used cedar shingles on this house I think from the Little Dollhouse Company and I think that makes a difference in the colour.
DeleteWow just Wow!! I have been reading your tutorials and geeking out on all your doll houses and box scenes for about 6 months now. I decided to try it and will be buying this kit this weekend and doing the cork brick. Do you by chance know how many shingles you used for the roof? Thanks so much! Kelly
ReplyDeleteThank you so much!! That's so nice to hear you've been a fan! I actually bought a kit myself this weekend too :) The price was so good and I want to do one where I don't rush and fully photograph/video. And add lights!
DeleteI personally like either the shingles from Real Good Toys, or cedar shingles from the Little Dollhouse Company. I find the houseworks ones are too rough and hard to glue.
I'm going to have to check, I thought it was one big bag and then 2 little bags. But I'll work it out this afternoon based on sq. footage coverage. I do find sometimes it's better to have a few extra because you break one, or you don't like how one is chipped etc.
Okay I think you need one big 1000 bag and then 3 small bags to be very very safe. Probably will get away with less, but it's hard to say. That works for the miniaturescom Houseworks and the Little Dollhouse Company cedar options. But for the Real Good Toys, their big bag is only 800, so you'd need 1 big bag and 5 smaller bags.
DeleteEither way I was estimating 1300 shingles to be safe maybe 1200. I did it by square footage of the parts so I just squared off the gable pieces in the math.
I remember having one big bag from an RGT dollhouse and using half another big bag when I did my first Brentwood.
The cedar shingles... I can't remember, I just used what I had at home already and then ran out! You can't see it but I still have to finish shingling some parts.
I will come back and update this when I do my third Brentwood!
DeleteAbsolutely beautiful! So much talent.
ReplyDeleteHi, where did you find your model train gravel? I can only find very fine or very large gravel.
ReplyDeleteHi! I think it was by Woodland Scenics. It was from a hobby train type store.
Delete