
After all these structure posts I'm thrilled to have something more interior focused to share! This week I brought three projects to life using my local library's laser cutter. I now have a living room set for the build and an extra roombox to play with.
*Before I get into things, I just want to remind those interested in trying laser cutting that Ponoko is an online shop that can cut your designs and ship them to you. Before I used the laser cutter at my city library I had great success with their online shop. A lot of what I know about designing for a laser cutter was from reading their tutorials (you can use Inkscape (free), Illustrator, etc). So don't let access to one of these machines hold you back!*
I tried a new approach this time around. After creating my designs in Adobe Illustrator (which I succumbed to purchasing the CC version for a month) I uploaded them into the Silhouette design software and cut them out in cardstock first.
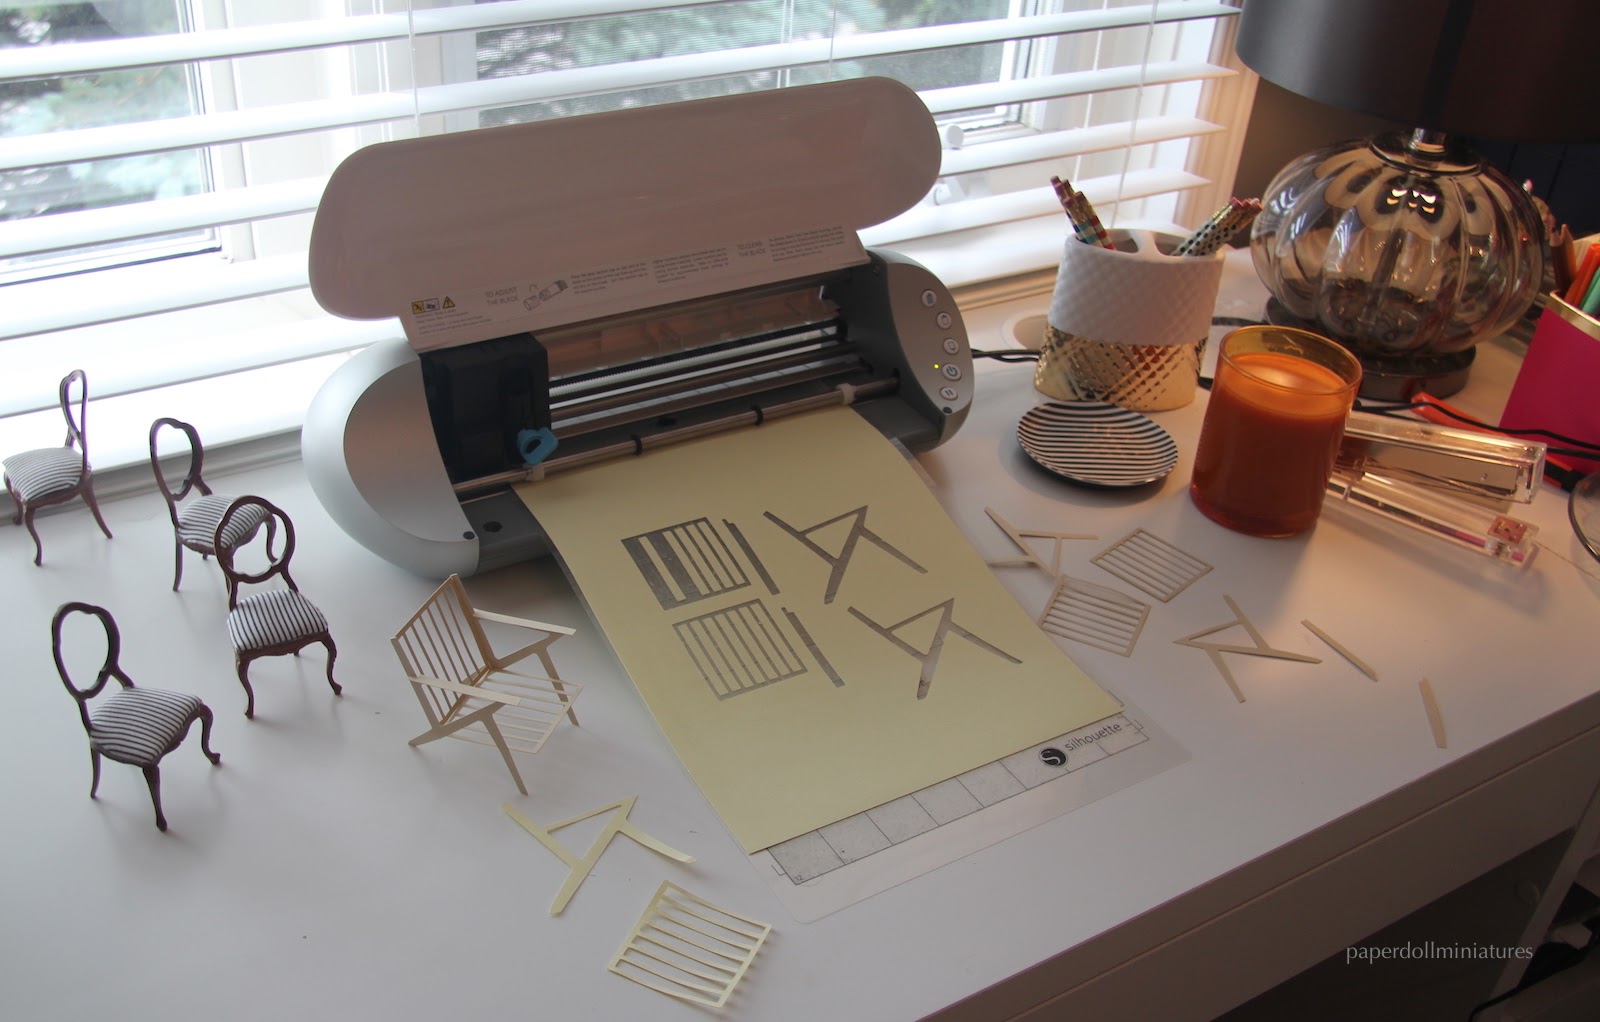
This was the perfect way to catch design flaws! Usually I'd waste a lot of expensive hobby wood and time at the laser cutter before getting the design just right, but the cardstock made it simple and quick to visualize and fix issues.
Below is a progression of my side chair frame design. You can see how small and out of scale the math was on my first version and how each one changed. The final piece is cut with the laser.
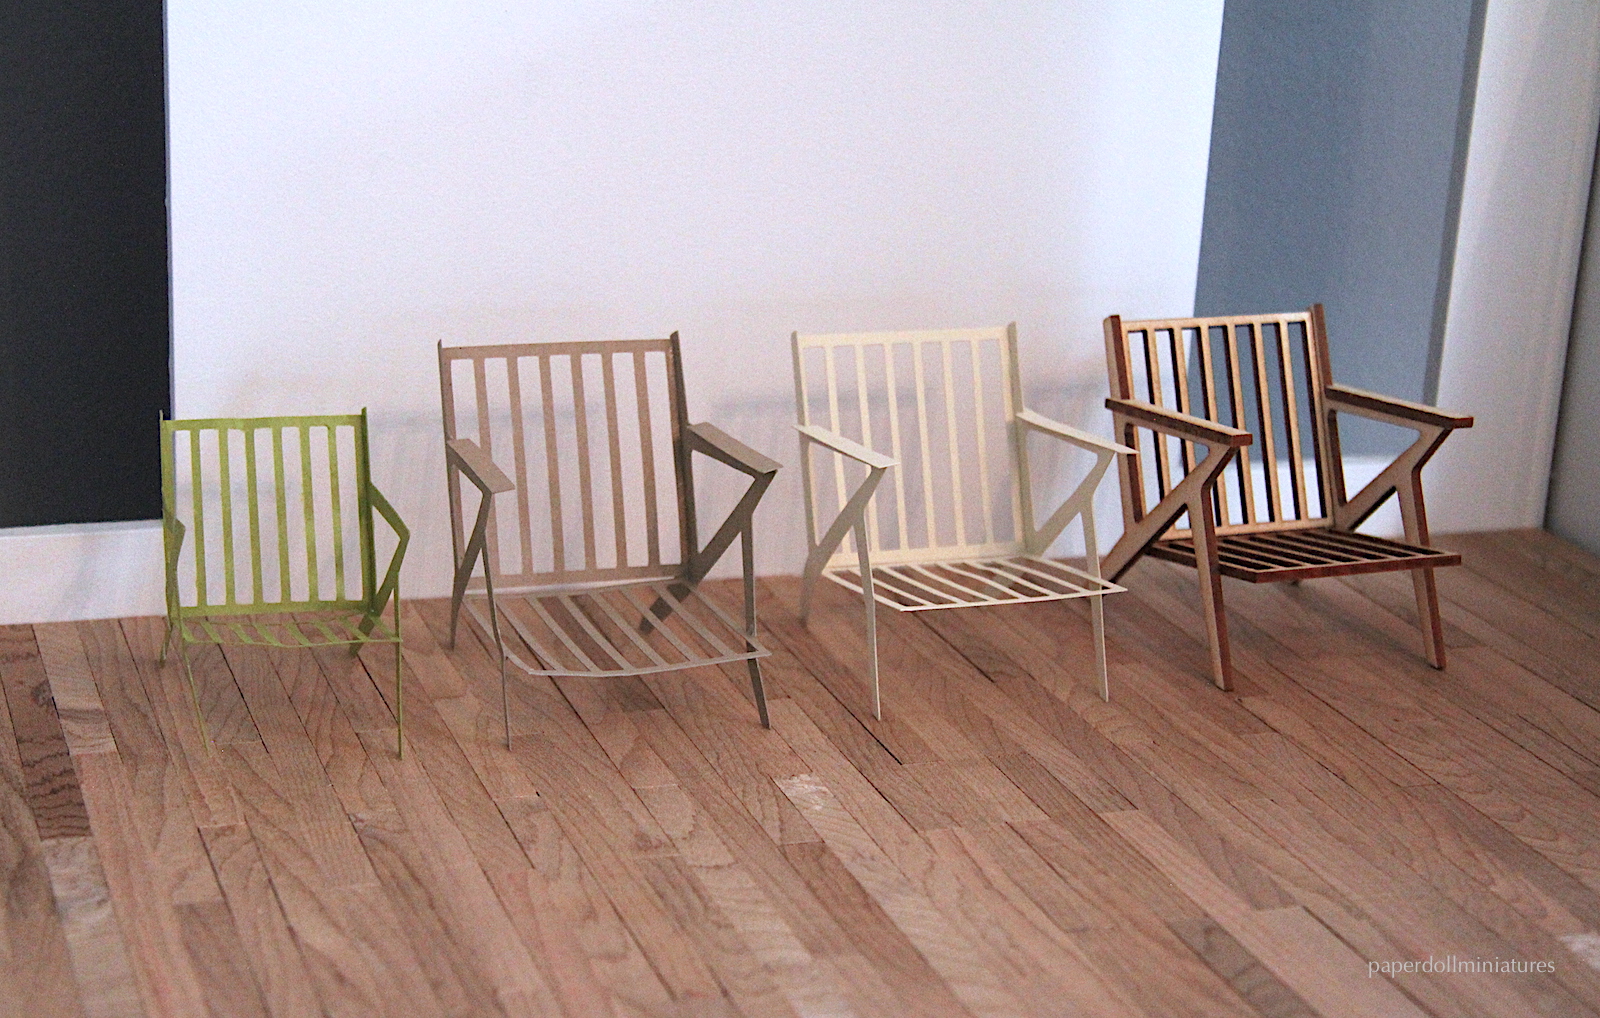
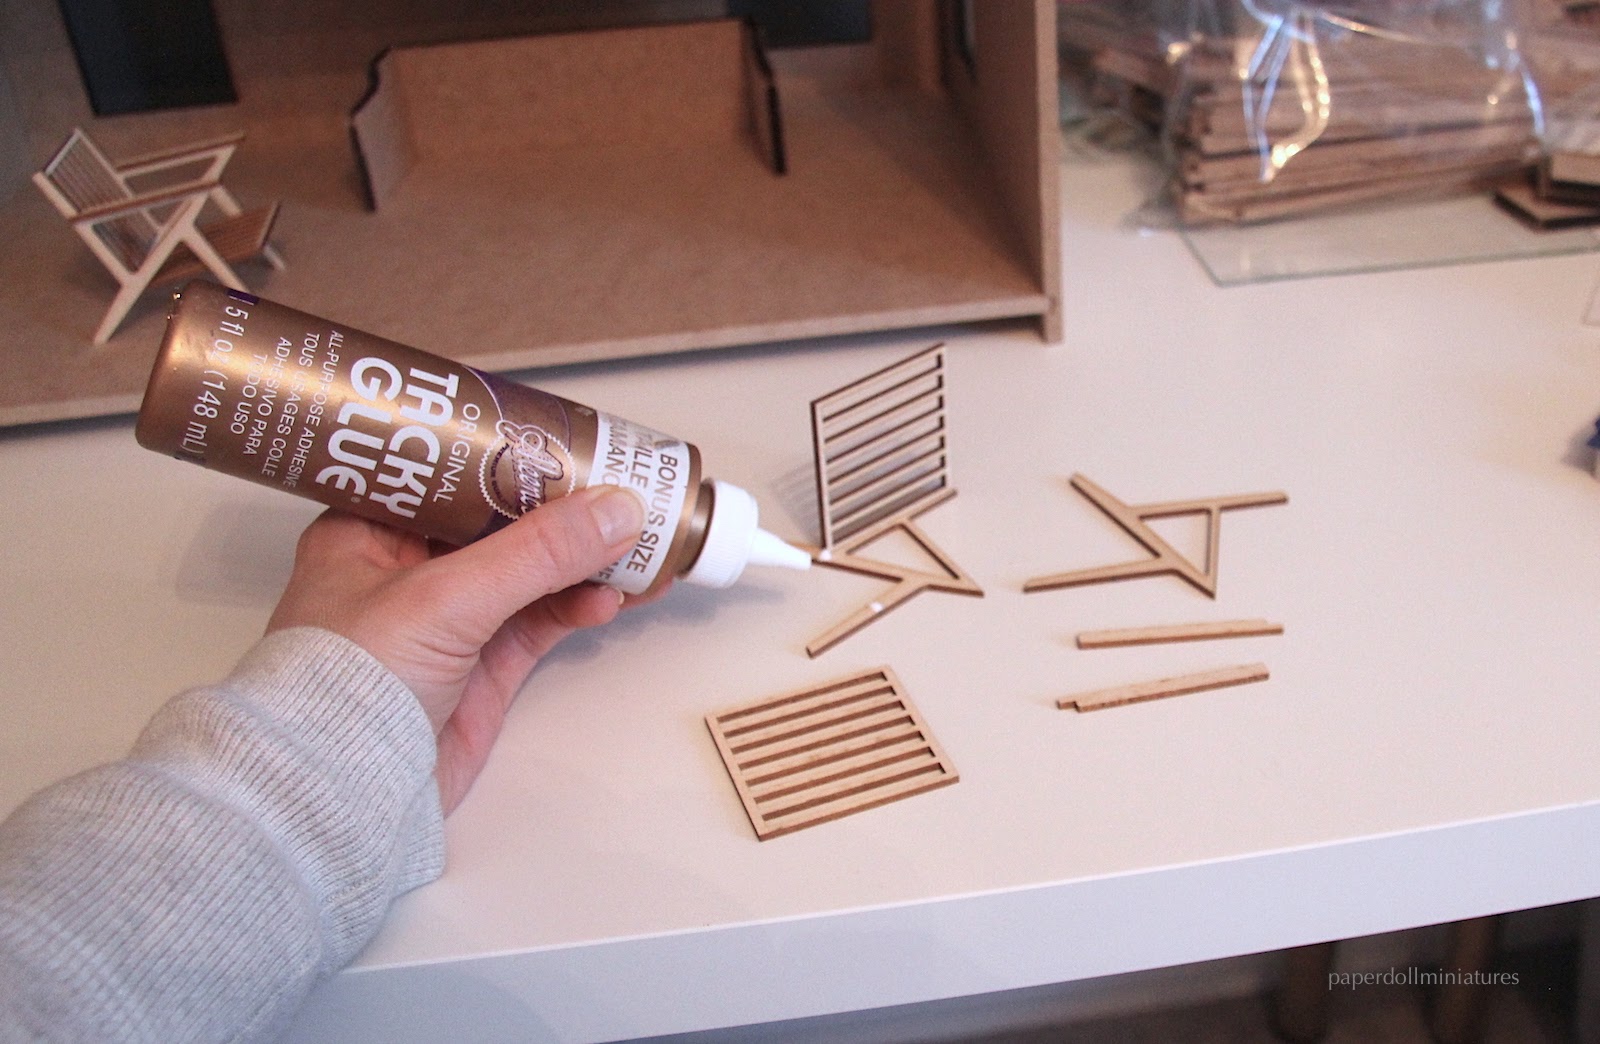
Cutting 1/8 basswood:

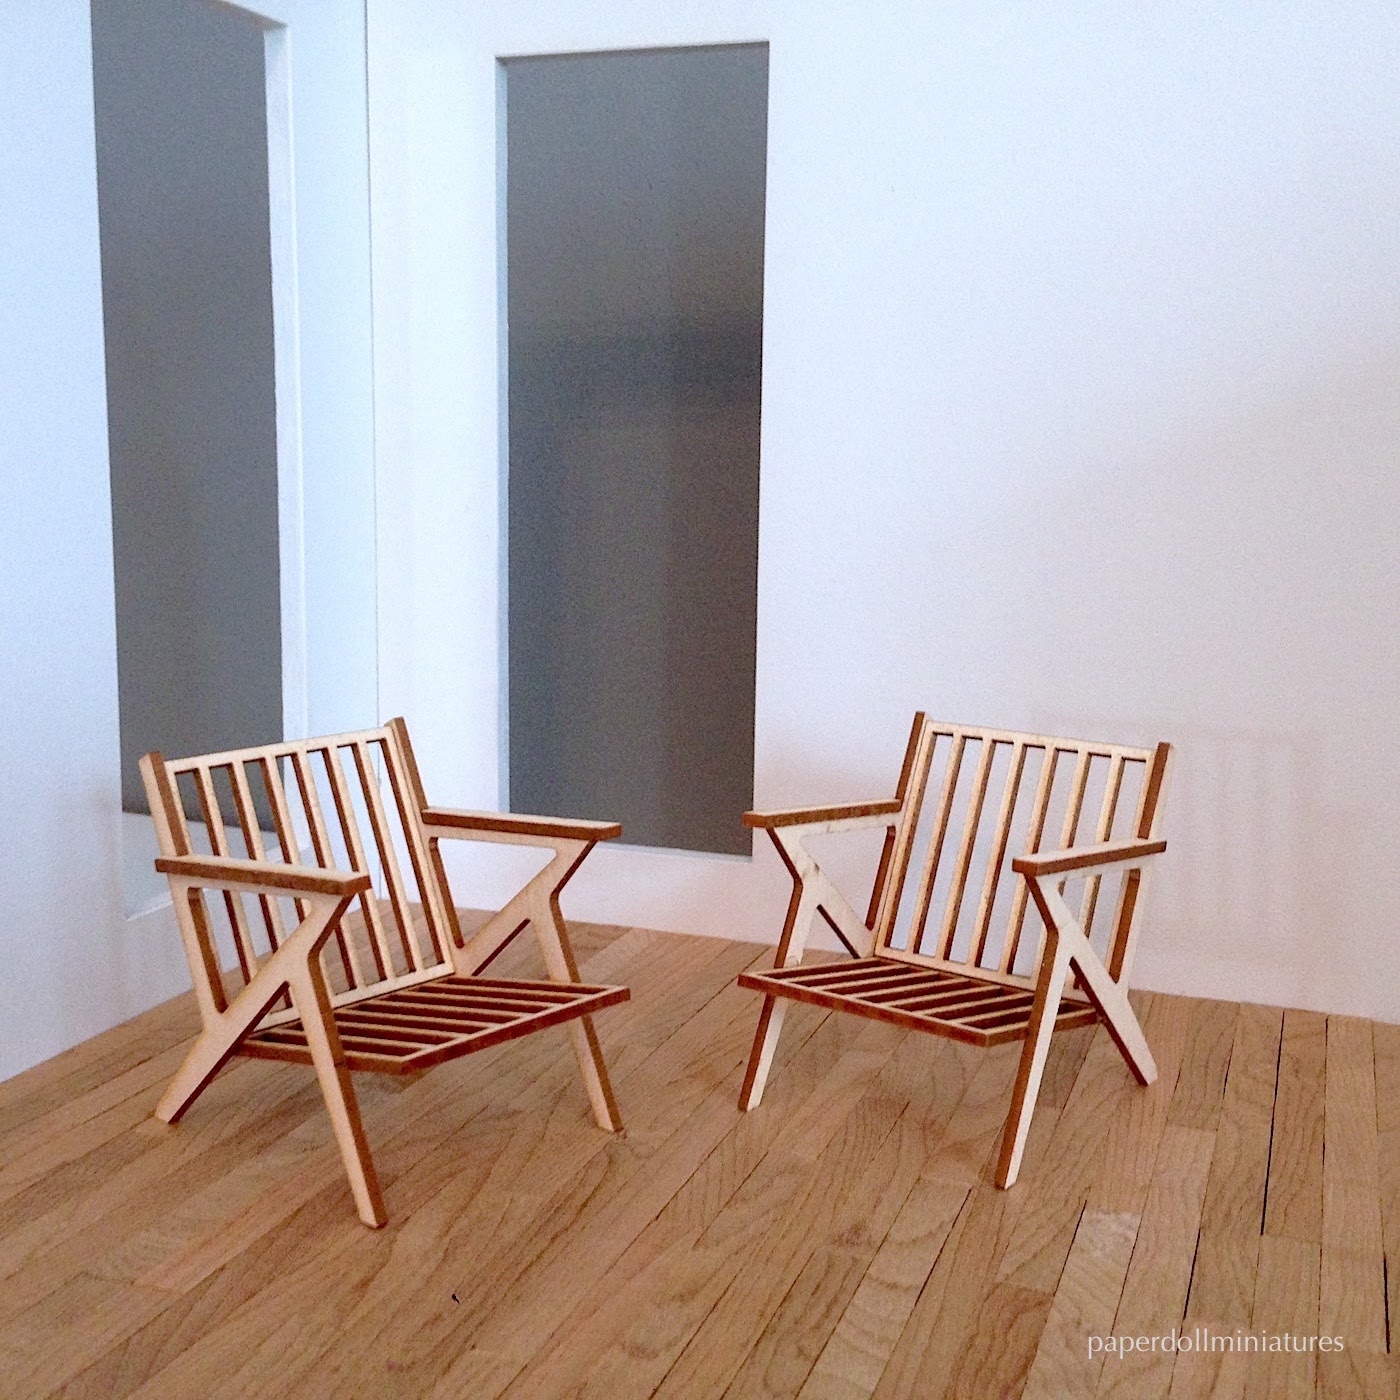
Assembly:
Now I just need to add stain and make cushions.
Cushion idea using foam board for now:

Next project was making a modern miniature sofa. This one was a bit more difficult to plan out because it's hard to know exactly how much room I will need for fabric and foam on the cushions. Again I first cut it out of cardstock to check my math and then revised.
At the laser cutter I cut 1/4 MDF. It was very difficult and did not want to cut all the way through, especially the curved lines. I had to do multiple passes and it made the edges burn.
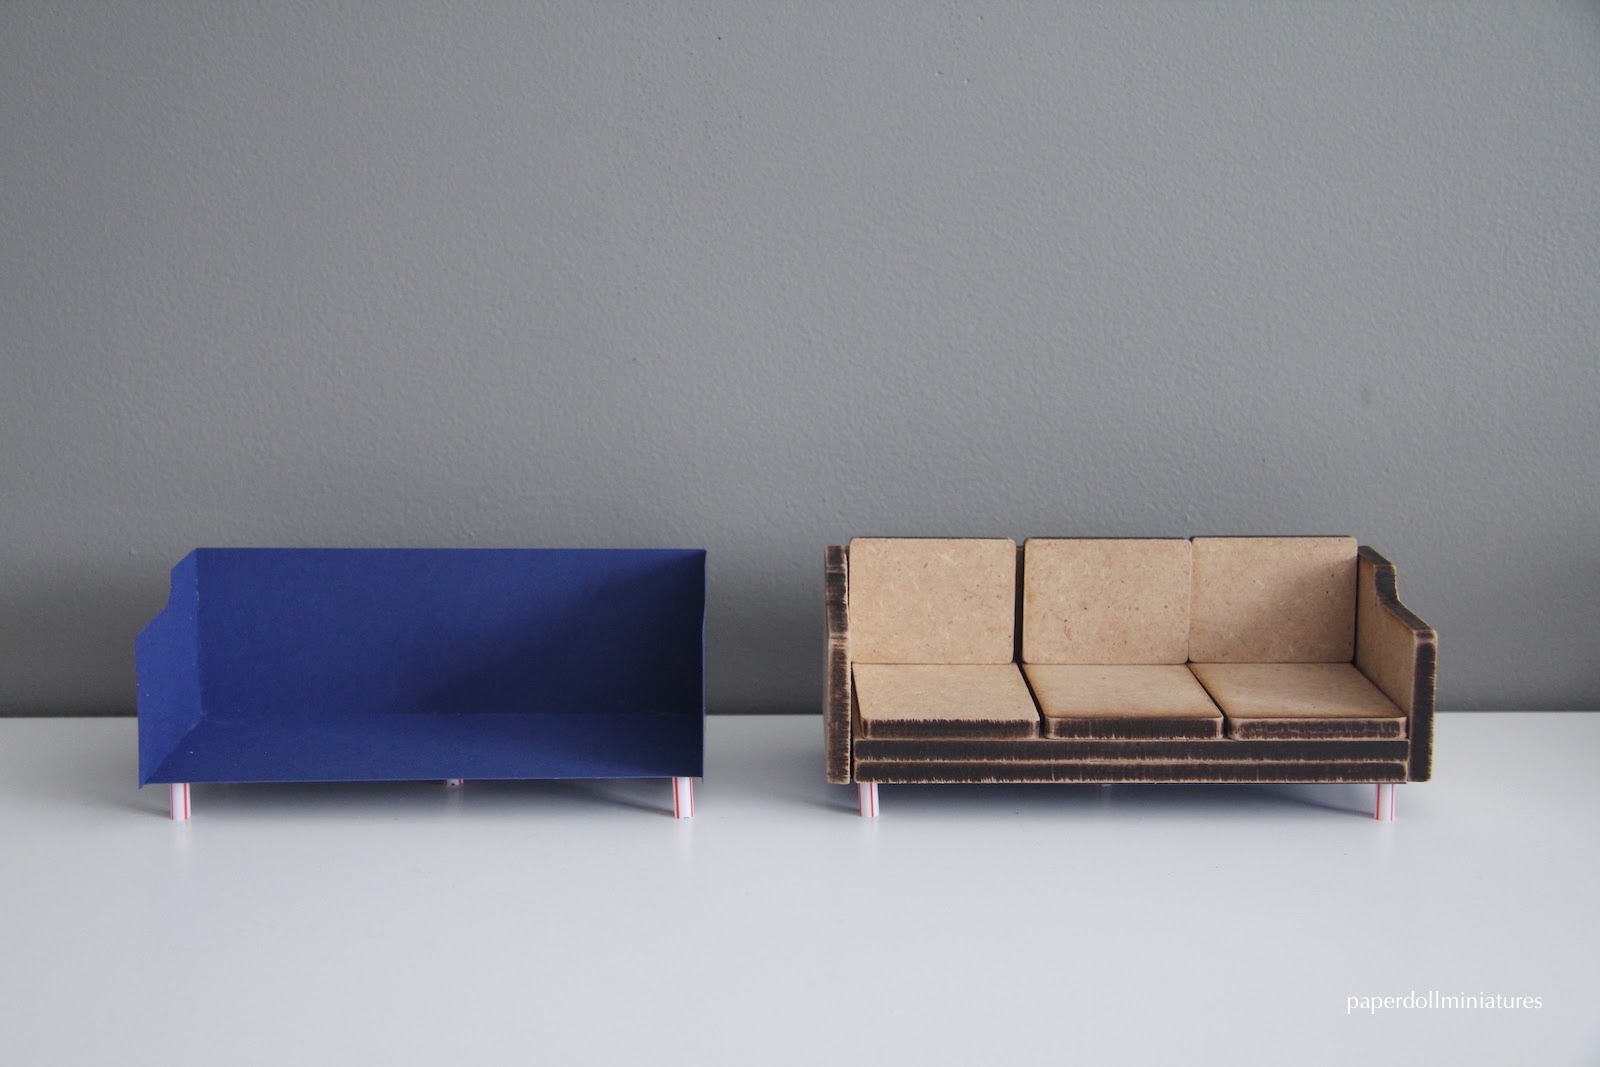
I decided to make the cushion corners rounded. I'll add padding next. The entire sofa is 11 pieces without legs.
Below was how I tried to figure out how large to make my cushions.

And finally I took the roombox from the right side of the build and added in some windows. This roombox is actually 2" too short for the build so I plan on just using it for quick display and modern dollhouse scenes. (My boyfriend just shakes his head because we've already recut this twice now. But I'm excited to have an extra display!)
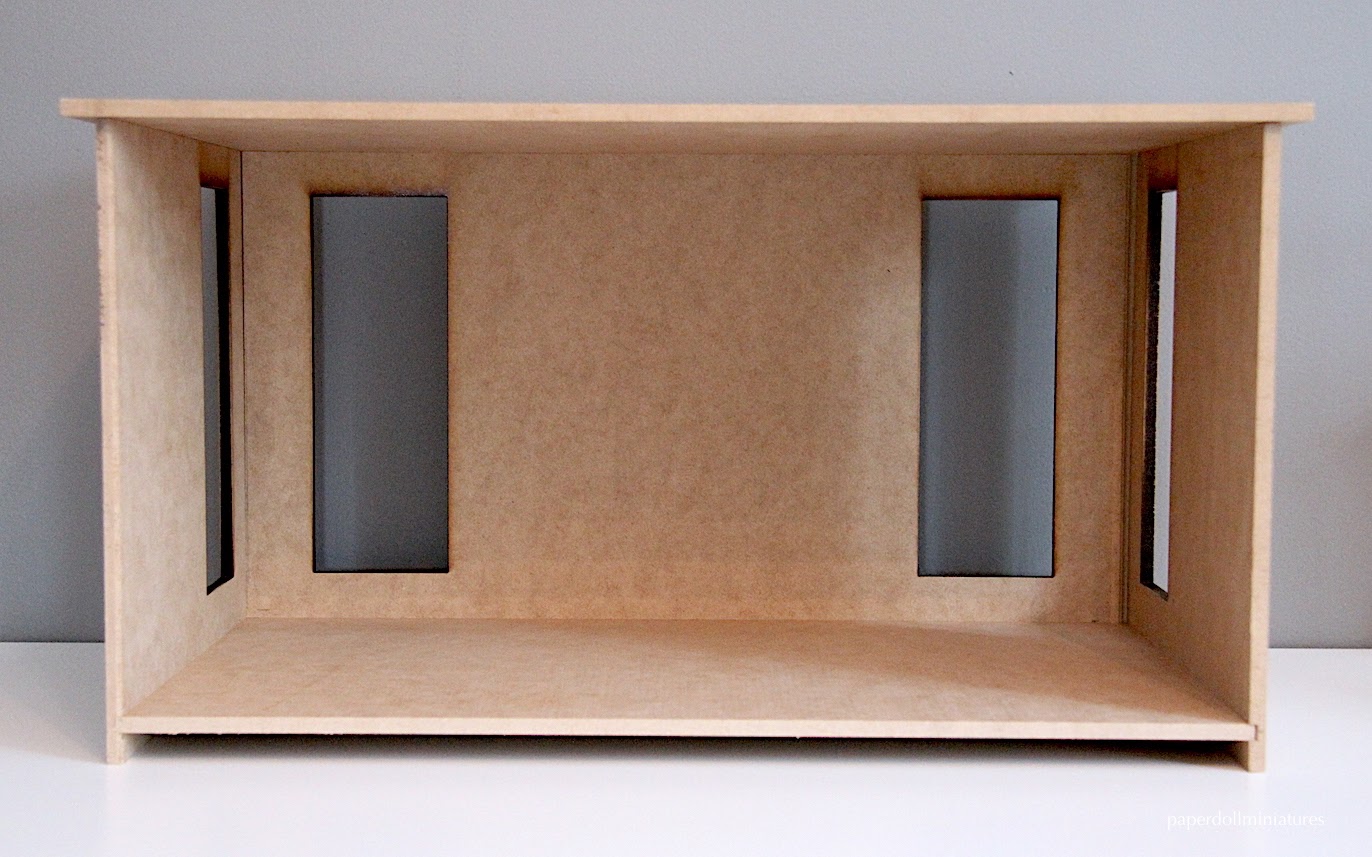
I painted and added some (temporary) floor boards. I have laser cut windows in my stash somewhere to add in.

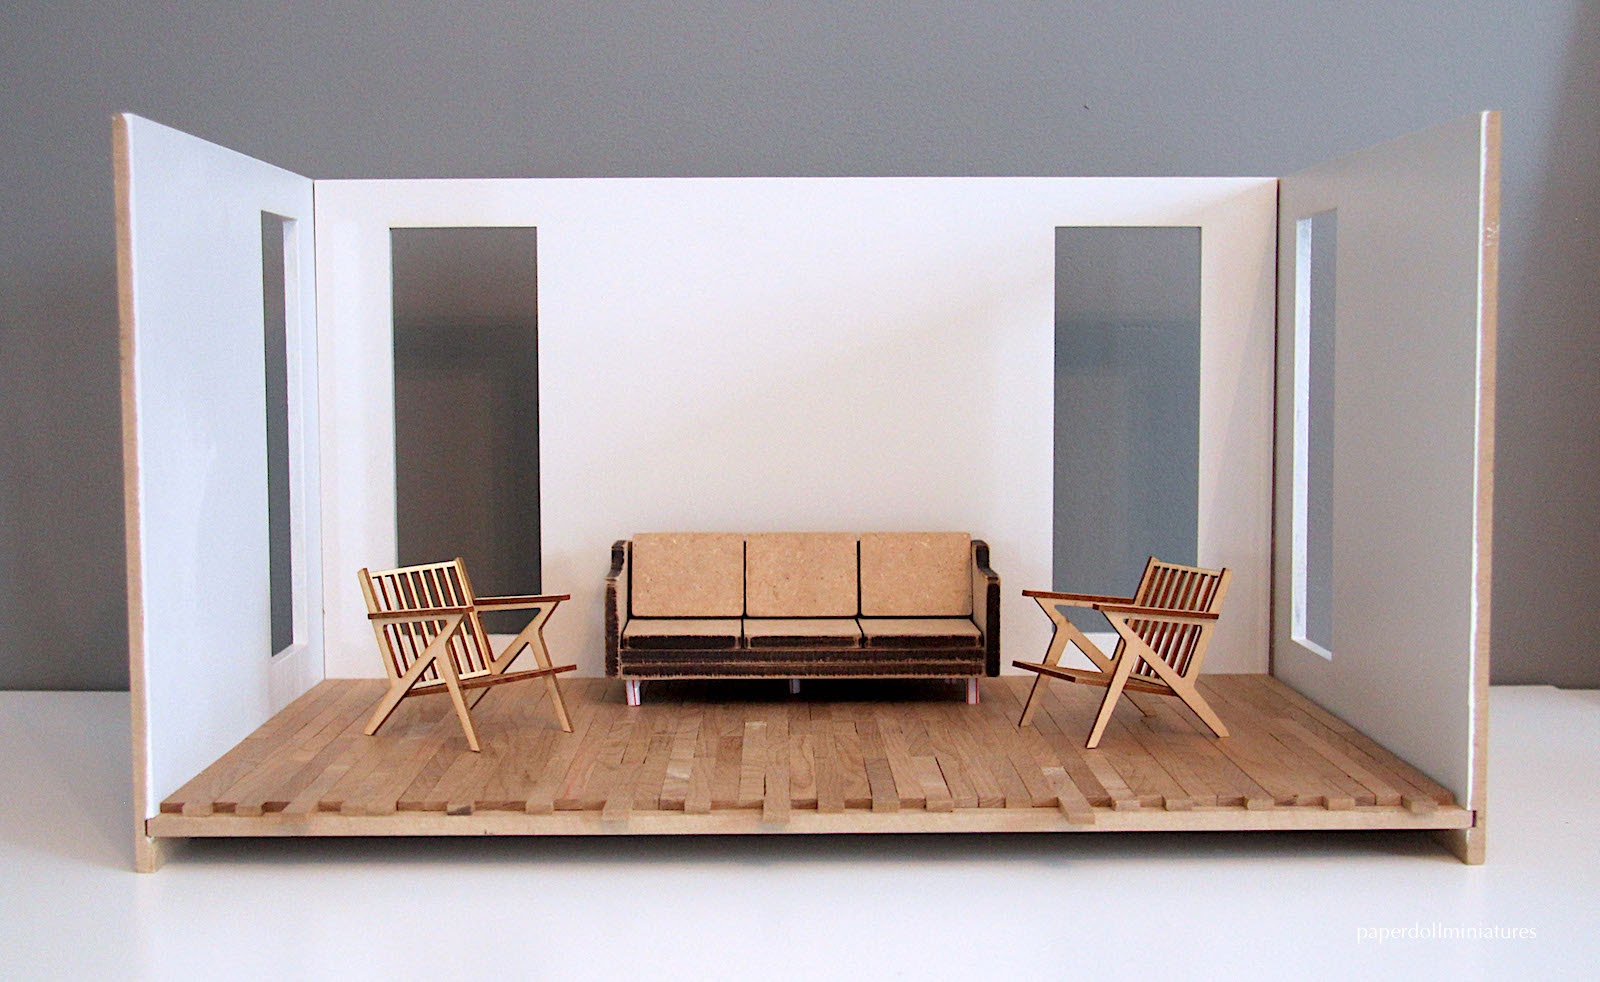
It was so motivational to see everything come together and have a bit more of a design/decor element. I now have the next four days to complete my kitchen design in time for my next laser cutter booking, so it's going to be busy! Hope you are all having a great mini making weekend!
The card stock tests were a great idea. Love how the chairs turned out. 😀
ReplyDeleteThanks! Yes the cardstock really saves me so much time and money!
DeleteWow! Love how everything looks. Our Library has a laser printer (at one of the branches). I might have to look into getting to use it.
ReplyDeleteYour library has one too?! You have to try it out Shelia! If you have any questions I'd be happy to help :)
DeleteWOW Kristine! I find You and what you do, simply Fascinating! Your chair designs turned out so well and your sofa has taken shape, and it is not even finished! Two thumbs UP!
ReplyDeleteThanks Elizabeth, it's nice to be able to see the sofa shape as you said. Usually you have to wait until fabric etc is put on before you can really see the design.
DeleteMe encanta el diseño,tanto de las sillas como del sofá,quedan perfectos!!!!
ReplyDeleteBesos.
DeleteGracias, es emocionante verlo venir juntos!
kristine, fabulous! that laser cutter is great - and your models as well. super!!
ReplyDeleteIt's a lot of fun, thanks Marion!
DeleteIt's a really great tip to try card first because laser cutting does waste a phenomenal amount of wood. I love your chairs, sofa and room box...especially the straw legs :0P
ReplyDeleteI think I cut my last kitchen 2-3 times over because my dimensions were just a bit off, so I'm super pleased with the card stock visual first. Thanks for the compliments, I feel like the straw legs add a circus vibe?! ;)
DeleteThe card first is such a good idea! Can't wait to see the final cushions.
ReplyDeleteThanks! The question will be whether I sew or use iron on adhesive... I'm tempted to try sewing for this one!
DeleteSo many possibilities! Thanks for the link to the laser cutter service. I'll have to check if there are local places, too. The chairs and sofa look great so far! :]
ReplyDeleteThanks Brae! I did have really great experience with Ponoko. Sometimes local places aren't cheap so it was a good alternative. But hey, a lot of people are mentioning their libraries are adding maker spaces too! Maybe you'll find one! :)
DeleteHow neat! I find laser cutting very intriguing!
ReplyDeleteThank you Claudia, it's a lot of fun and much more precise then building by hand.
Delete*claps* clever you! Your designs are lovely and modern and great idea to test them out in the silhouette first! I'm really loving those floorboards in your roombox. What are they made of? Cheers.. Sam.
ReplyDeleteThank you Sam, aren't the floors lovely?! They're still meant for the CC2017 build but I couldn't help putting them in here for now. They are made of medium roasted maple planks that have been resized and cut down into strip wood. I did a post a couple back on how to cut down wood. Definitely more time consuming but really worth the results!
DeleteYes they are!.. I'm going to go and check out your post now. :)
DeleteLove the design of the sofa and the chairs! They are going to look smashing when all decked out! And a bonus room box? What a happy accident!
ReplyDeleteMy boyfriend is a little less then happy we're re-doing it, but I'm super pleased! ;) I'm so happy to have an extra display. Thanks for the kind words!
DeleteEstá claro que con esa técnica se pueden hacer maravillas y a demás de forma limpia.
ReplyDeleteEs una gran herramienta. Gracias!
Delete